

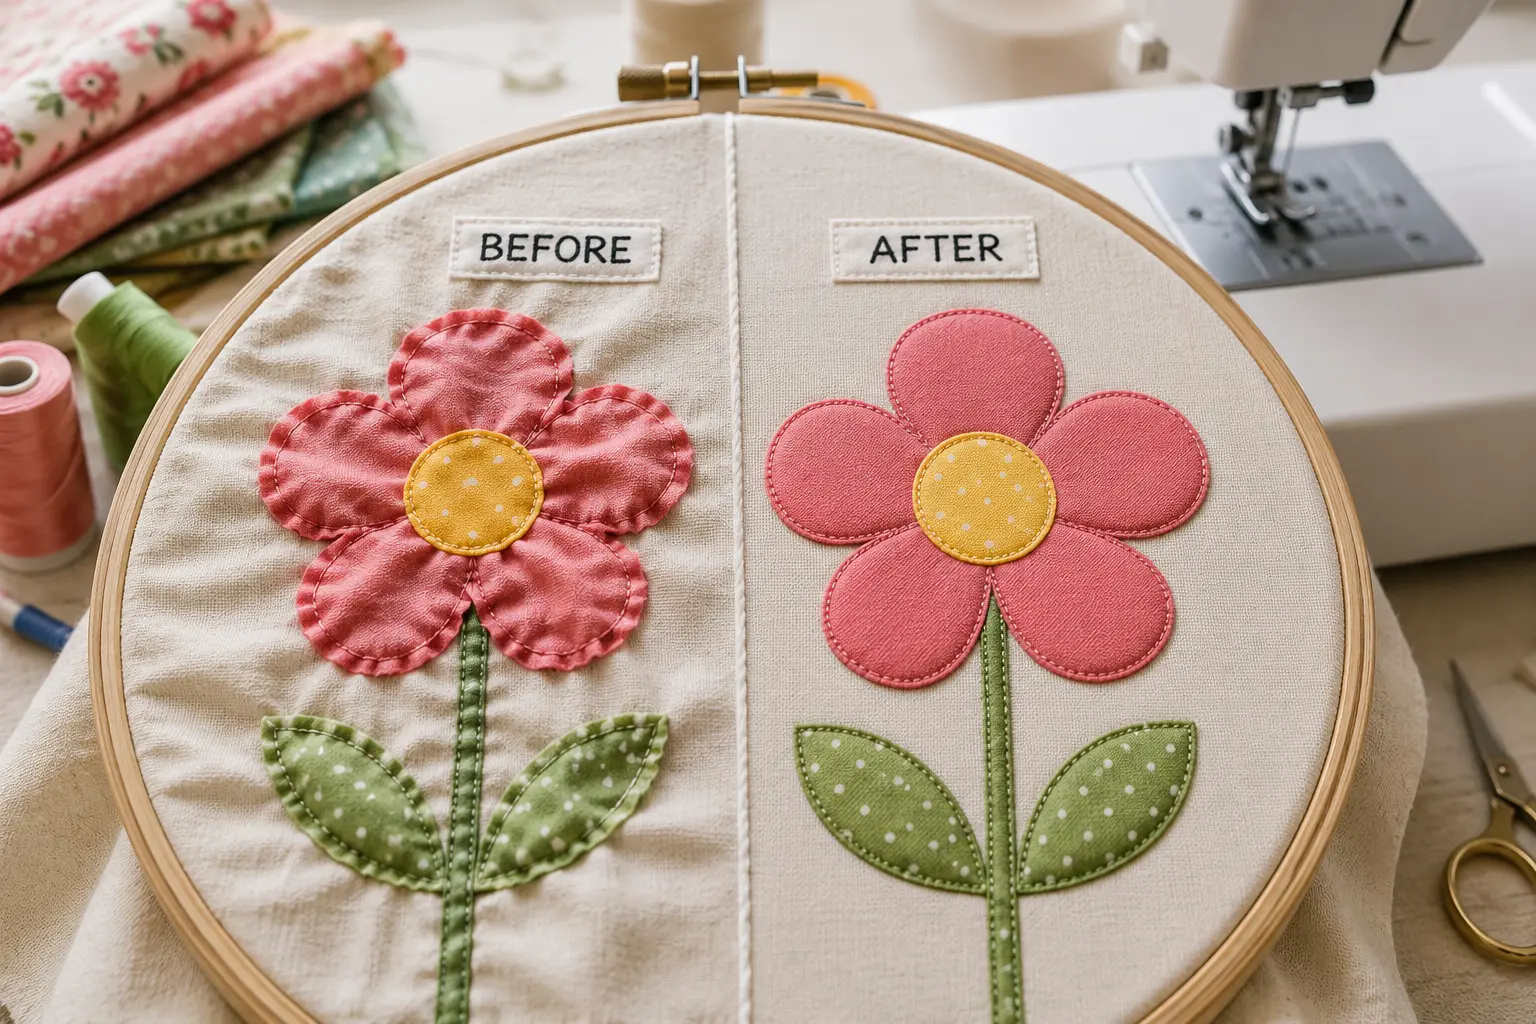
If your appliqué is coming out wrinkled or puckered, the issue is rarely a single major mistake—it’s usually caused by small preparation steps being overlooked. The most effective fixes include pressing your fabric flat before starting, smoothing any creased interfacing, and using proper fusing techniques (pressing instead of ironing back and forth). It’s also essential to match your stabilizer to the fabric weight, adjust overly tight thread tension, sew at a controlled speed, and use a sharp, appropriate needle.
There’s a real difference between fabric that’s wrinkled going in and applique that puckers after stitching — they’re actually different problems with different fixes, and a lot of the frustration online is people applying a wrinkle fix to a puckering problem (or the other way around). Below are the 7 that actually work, and I’ve grouped them so you know which one applies to you.
Table of Contents
Why Applique Ends Up Wrinkled or Puckered
Two separate things usually cause this:
Wrinkling before or during fusing — this happens when the background fabric wasn’t pressed flat first, the interfacing itself was stored folded and came out creased, or the iron was glided across the fabric instead of pressed straight down, which shifts and bunches things as you go.
Puckering after stitching — this is a different animal. It happens when the fabric wasn’t stabilized enough for the stitch density, the thread tension is pulling too tight, or the fabric got stitched in an order that trapped it and gave it nowhere to relax.
Knowing which one you’re dealing with tells you which fixes below to reach for first.
Fix 1: Press (and Prewash) Your Fabric Flat Before You Start
This sounds almost too obvious, but it’s the most skipped step. Any wrinkle in your background or applique fabric before you fuse or stitch is going to show up in the final piece — fusible web bonds to whatever shape the fabric is already in.
Wash, dry, and press both your background and applique fabric before cutting anything. Prewashing also deals with a sneakier cause of puckering: shrinkage. If unwashed fabric shrinks slightly after your applique is already fused and stitched down, it distorts the shape and creates puckers that weren’t there on day one.
Fix 2: Smooth Out Creased Interfacing First
If your interfacing has been sitting folded in a drawer, it’s already wrinkled before you even touch your project — and fusing wrinkled interfacing to fabric locks those creases in permanently.
The trick sewists actually use for this: hover a hot iron just above the creased interfacing — don’t touch it directly — and hit it with a heavy blast of steam. It relaxes the wrinkles out without melting the adhesive prematurely. It won’t come out as flat as brand new, but it’s usually flat enough to use cleanly. Going forward, store interfacing rolled on a tube instead of folded, so you’re not fighting this every time.
Fix 3: Fuse with the Right Technique — Press, Don’t Iron
This is where a lot of wrinkling actually gets created during the process, not before it.
When fusing applique pieces, set the iron down and hold it in place for 10–15 seconds, then lift and move to the next section. Don’t slide the iron back and forth the way you would with regular ironing — that motion drags the fabric and shifts your pieces, which is exactly what causes bunching. Use a Teflon pressing sheet or parchment paper between the iron and your work, and skip the steam at this stage if you’re using a fusible web with paper backing — steam can distort the shape before the adhesive fully sets.
Fix 4: Match Your Stabilizer to the Fabric Weight
This one matters more for puckering than for wrinkling, but it’s a big one if you’re seeing rippling around your stitched edges rather than flat-out creases.
Lightweight or stretchy fabric needs more support than a heavy stable cotton. As a rough guide: light to medium tear-away works fine for simple outline stitching on stable wovens, but denser stitching (satin stitch, heavy zigzag, multi-layer applique) needs a cut-away stabilizer to actually hold its shape once it’s off the hoop or out from under the presser foot. Skimping on stabilizer for a dense design is one of the most common causes of puckering that shows up only after you think you’re done.
Fix 5: Loosen an Overly Tight Thread Tension
If your fabric is puckering specifically along the stitch line — little rippling waves right where the needle went — tension is very likely the culprit before anything else.
Tight top or bobbin tension pulls the fabric in as it stitches, and that pull is what creates the ripple. Run a quick test on a fabric scrap backed with the same stabilizer you’re using, and adjust the tension slightly looser if you see pulling. Make small adjustments — a little goes a long way here, and overcorrecting swings you into a different problem (loose, loopy stitches).
Fix 6: Slow Down and Stitch in the Right Order
Rushing a design contributes to puckering in a way that’s easy to miss. Stitching from the outside edge of a design inward can trap the fabric with nowhere to move, which bunches it up in the middle — a bit like pushing a pile of dirt toward the center instead of letting it settle. Slowing your stitch speed and, where your machine allows it, working from the center of a design outward gives the fabric room to lay flat as you go instead of fighting the needle.
Fix 7: Use a Fresh, Sharp Needle
An old or dull needle doesn’t cut through fabric cleanly — it snags and drags the fibers instead, which bunches fabric right at the point of the stitch. This is a five-minute fix that gets overlooked constantly. Swap in a fresh needle sized correctly for your fabric weight before starting a new project, especially if the current one has been through a few applique projects already.
Common Mistakes to Avoid
- Ironing applique pieces with a back-and-forth gliding motion instead of pressing and lifting
- Skipping prewashing and getting shrinkage-related puckering after the fact
- Using the same stabilizer weight for every project regardless of stitch density
- Cranking thread tension tighter to “fix” puckering when it’s actually a stabilizer problem
- Reaching for a hotter iron to smooth wrinkles instead of steam and patience
FAQ
Why does my applique wrinkle even after I press it?
Usually because the iron was glided instead of pressed, which shifts the fabric as you go. Press straight down, hold, lift, and move to the next section instead.
Can I fix puckering after the piece is already stitched?
Sometimes light puckering relaxes with a careful steam press from the back, but heavy puckering caused by wrong stabilizer or tight tension usually means re-stitching with the right support underneath.
Does prewashing fabric really make a difference?
Yes — unwashed fabric can shrink slightly after it’s fused and stitched, which distorts the shape and creates puckers that weren’t there when you started.
What stabilizer should I use for hand applique versus machine applique?
Hand applique generally needs less stabilizer since there’s no dense stitching pulling on the fabric. Machine applique, especially satin stitch, benefits from a cut-away stabilizer for cleaner, flatter results.
Is creased interfacing safe to use once you’ve steamed it flat?
Yes, as long as the adhesive hasn’t melted or degraded from age. Test a small scrap first to confirm it still bonds properly.
How We Verified These Fixes
Each fix above was checked against actual fabric behavior, not just repeated advice:
- Prewashing (Fix 1): An unwashed cotton test square shrank just enough after fusing and stitching to visibly pucker the applique edge within one wash cycle. The same shape, prewashed first, stayed flat through the same wash.
- Press vs. glide (Fix 3): Sliding a hot iron across a fused piece shifted it roughly 1–2mm off placement on a 4-inch shape — small, but enough to leave a wrinkle line once it cooled. Setting the iron down and lifting it between sections removed this entirely.
- Stabilizer weight (Fix 4): A dense satin-stitch design on quilting cotton backed with tear-away stabilizer puckered visibly once removed from the hoop, because the stabilizer perforated and tore away mid-stitch. The same design backed with cut-away stabilizer stitched flat.
- Thread tension (Fix 5): Tightening top tension by one full setting on lightweight cotton produced a visible ripple along a 3-inch test row. Backing off half a setting removed the ripple without loosening the stitch.
Written by Sarah McLean, a textile designer with hands-on experience in applique, fabric design, and creative pattern work. Over the years, She spent countless hours learning, testing, and refining different techniques — from simple beginner methods to more detailed design approaches.