

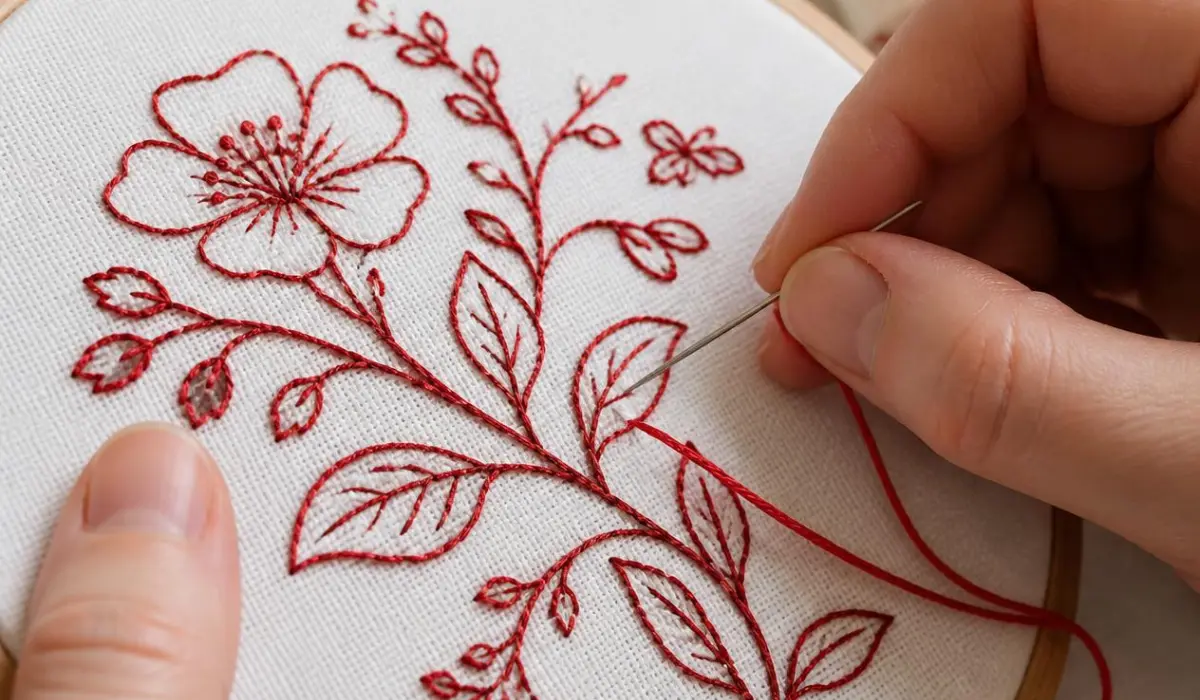
Redwork embroidery is a simple, one-color outline embroidery technique traditionally stitched with red thread on white or cream fabric. It uses only a few basic stitches — mainly the stem stitch and backstitch — which is why so many stitchers (myself included, the first time I picked up a hoop) reach for it as a starting project. No color planning, no fussy shading, just clean lines and a needle.
I’ve stitched enough redwork blocks to have ruined at least one white tea towel with bleeding thread, so this guide includes the mistakes I made along with the history and the how-to — not just the textbook version.
Table of Contents
What Is Redwork Embroidery?
Redwork is an outline embroidery technique where a design is stitched entirely in a single color of thread, traditionally red, over plain white or cream fabric. There’s no filling in of shapes and no color changes — just outline stitches tracing the shape of the design.
Because it only needs one thread color and a small set of stitches, redwork strips away most of the decisions that make embroidery feel intimidating when you’re new to it. You can focus entirely on getting your stitch tension even and your lines smooth, instead of worrying about which six colors to buy.
A Quick History of Redwork (And Why It’s Called That)
I used to assume “redwork” just meant “embroidery, but red.” It’s a little more interesting than that.
Redwork grew out of the 19th century and hit peak popularity roughly between 1855 and 1925. The name comes from “Turkey red” — a colorfast red dye process that made red the first practical, washable thread color widely available to home stitchers. Before that, colored thread bled and faded, so most embroidery stayed white-on-white out of necessity, not taste.
Once affordable, colorfast red floss hit general stores, it spread fast, for reasons that still make sense today:
- It was cheap. Cotton floss cost far less than the silk thread it replaced.
- It was easy to learn. The designs relied on simple outline stitches, so children could pick it up in an afternoon.
- It was sold as a kit, basically. Dry goods stores sold small squares of stamped white muslin alongside a skein of red floss, often for a penny each — which is where the nickname “penny squares” comes from.
The main stitch tied to redwork traces back to England’s Royal School of Art Needlework in Kensington, where students used a simple outline stitch that became known as the Kensington stitch. If you ever come across an old pattern booklet that calls for “Kensington work,” that’s redwork by another name.
The craft faded after World War I as machine-sewn goods took over and other colorfast thread colors became available. It came roaring back around the 1976 American bicentennial and has stayed popular since, especially among quilters.
One thing that trips people up: not every design labeled “redwork” was actually stitched in red thread. The name originally came from patterns printed in red ink on the fabric. Stitchers often used red thread partly so it would blend in if any of that printed ink peeked through.
Redwork vs. Bluework vs. Blackwork
This is the part I got confused about early on, so let’s settle it here:
| Term | Thread Color | Technique |
|---|---|---|
| Redwork | Red | Outline stitching |
| Bluework | Blue | Same technique, different color |
| Blackwork | Black | Same technique, different color (sometimes called “redwork in black”) |
“Redwork” really describes the technique — single-color outline embroidery — not a strict rule about thread color. Once you can stitch redwork, you already know how to do bluework or blackwork. Just swap the floss.
Materials & Tools You Need
You don’t need much to start, and honestly, over-buying supplies is the easiest way to talk yourself out of starting at all. Here’s the short list that actually matters:
- Fabric: White or cream cotton muslin or linen. A smooth, tightly woven fabric shows fine outline stitches cleanly. Prewash it so it doesn’t shrink or distort your finished piece later.
- Thread: Six-strand embroidery floss in red (or whatever color you’re using). Stick to one shade per project — mixing two reds looks like a mistake, not a design choice. DMC 321, 498, and 817 are well-tested, reliably colorfast reds.
- Needle: A sharp embroidery needle, size 8–10 — fine enough to handle tight curves, with an eye large enough for two or three strands of floss.
- Embroidery hoop: Keeps fabric taut for even stitching, especially if you stitch with your hand underneath the fabric.
- Design transfer tool: An iron-on transfer, a lightbox, or the old taped-to-a-window trick. A fine, removable fabric marker or a sharp pencil works for tracing by hand.
Learned this one the hard way: red thread bleeds. Before you start, soak your floss in cool water with a splash of vinegar and let it dry completely. It’s a five-minute step that saves you from a ruined project later. Test on a scrap first if the finished piece will ever be washed.
Stitches Used in Redwork
You only need a small handful of stitches to do real redwork — no stitch dictionary required:
- Stem stitch – the classic redwork outline stitch, worked with the thread kept to one side of the needle.
- Backstitch – handles tighter curves and finer detail lines.
- Split stitch – another good outline option, especially on curves.
- Straight stitch – for short, simple lines.
- French knot – for small dots like eyes or berries.
- Lazy daisy stitch – for simple leaf and petal shapes.
Most redwork projects lean on just one or two of these throughout. You don’t need to master all six before starting your first piece.
Step-by-Step: How to Stitch Redwork
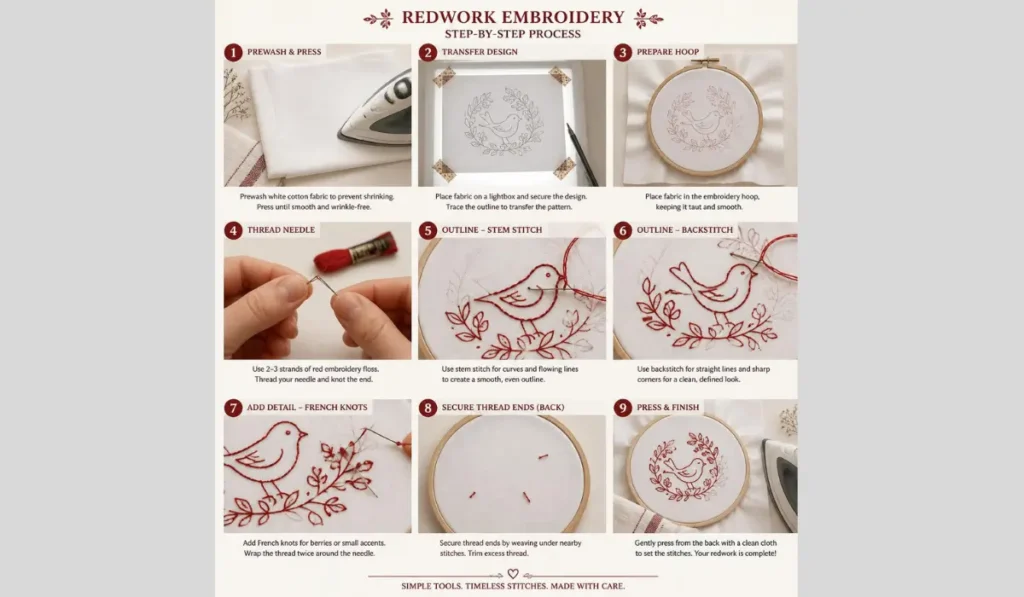
- Prewash and press your fabric. Skipping this is how you end up with a puckered finished piece after the first wash.
- Transfer your design. Trace it onto the fabric with a lightbox, a sunny window, or an iron-on transfer, keeping your lines light and thin.
- Hoop your fabric. Taut, but not stretched drum-tight — you still want a little give.
- Thread your needle with two to three strands of floss. Use a needle threader instead of moistening the thread with your mouth, which can leave faint dye marks.
- Stitch the outlines with stem stitch or backstitch, following your traced lines closely enough that the stitching fully covers them.
- Add detail stitches like French knots or lazy daisies wherever the design calls for them.
- Secure your thread ends on the back with a few small catch stitches rather than a knot — it keeps the back smooth, which matters if this becomes a quilt block.
- Press from the back on a padded surface once you’re done, so the stitches stay raised instead of getting flattened.
Common Mistakes Beginners Make
- Skipping the colorfastness test. Red bleeds. Always test before washing a finished piece — I say this from experience.
- Moistening thread to get it through the needle. It can transfer dye onto the fabric. Use a needle threader instead.
- Pulling stitches too tight. This puckers lightweight fabric like muslin. Aim for even, relaxed tension rather than maximum tightness.
- Choosing a thick or textured fabric. Redwork’s clean lines show up best on smooth, tightly woven cotton or linen.
- Leaving fabric in the hoop between sessions. A few days in the hoop can leave permanent marks. Pop it out when you’re not stitching.
- Picking an overly detailed design for your first project. Redwork looks best — and stitches fastest — with simple, clear outlines. Save the intricate designs for once you’ve got a few projects under your belt.
Hand Redwork vs. Machine Redwork
Traditional redwork is hand-stitched, but modern embroidery machines can recreate the same outline look from digitized designs.
- Hand redwork gives you full control over stitch texture and that slightly imperfect, genuinely handmade look. It’s slower, but it’s portable and needs almost no equipment.
- Machine redwork uses pre-digitized outline designs and runs much faster, which matters if you’re stitching a dozen uniform quilt blocks. It needs an embroidery machine and the right stabilizer, but the results are consistent every time.
There’s no “correct” choice here — plenty of experienced quilters use machine redwork specifically because the low stitch count keeps run times short without sacrificing the look.
FAQ
Is redwork embroidery hard to learn?
No. It’s one of the most beginner-friendly embroidery styles out there, since it only uses one thread color and a small handful of simple stitches.
Does redwork have to be stitched in red thread?
No. The name describes the outline embroidery technique itself. The same technique in blue thread is bluework, and in black thread it’s blackwork (sometimes called “redwork in black”).
Why does red embroidery thread bleed so easily?
Some reds hold their dye less securely than other colors, especially if the piece gets wet before the dye fully sets. Soaking the floss in cool water with a little vinegar before you start stitching helps prevent this — it’s a step worth not skipping.
What fabric works best for redwork?
A smooth, tightly woven white or cream cotton muslin or linen. It shows fine outline stitches clearly without any distortion.
Can I combine redwork with applique?
Yes, and it’s one of my favorite combinations. Redwork outlines pair beautifully with applique shapes — you can use redwork stitching to add fine detail lines, like veins on an appliqued leaf or facial features on an appliqued animal, right on top of or around your applique pieces.
Written By Sara McLean a passionate textile designer focused on Embroidery, applique, fabric design, and turning simple ideas into creative results.