

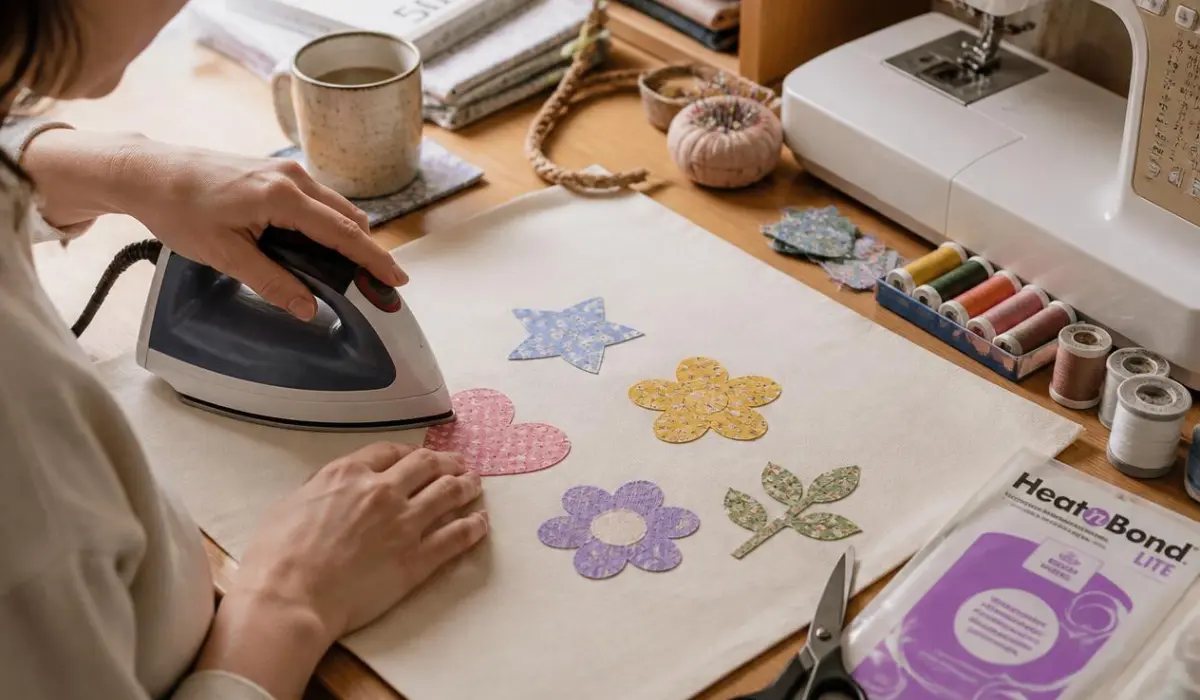
Apliquet is a sewing technique where you attach small fabric pieces onto a larger fabric base to create a design or picture. It’s one of the easiest ways for beginners to add color and personality to quilts, clothing, bags, and home decor — no advanced sewing skills required.
I’ve been sewing for over a decade, and my first apliquet project was a disaster — a felt heart patch I tried to iron onto my daughter’s denim backpack. I didn’t test the fusible web on scrap fabric first, the iron was too hot, and the adhesive seeped through the felt and left a shiny mark on the front. I had to cut a second heart and start over. That mistake taught me the one rule I now repeat in every beginner class I teach: always test your iron heat on a scrap piece before touching your real project.
Since then I’ve made apliquet quilts, kids’ clothing patches, and tote bags, and I’ve taught the fusible method to dozens of beginners at local sewing meetups. It’s not intimidating once you understand the basic method — most people finish their first shape in under 30 minutes. Here’s everything I wish someone had told me when I started.
Table of Contents
What Is apliquet?
Apliquet is the craft of sewing or fusing fabric shapes onto a background fabric. You cut out shapes — like flowers, animals, or letters — and attach them using hand stitching, machine stitching, or fusible adhesive.
Types of apliquet for Beginners
There are three main methods. As a beginner, pick the one that matches your comfort level and tools. I usually recommend starting with fusible apliquet — it’s the most forgiving of the three.
1. Fusible apliquet (Easiest)
Uses iron-on adhesive (like fusible web) to stick fabric shapes to the base before stitching around the edges. Great for first-timers because there’s no pinning or slipping fabric. This is the method I still use for quick projects, even after years of sewing. I personally reach for Heat n Bond Lite for anything I’ll stitch afterward, and the regular (non-lite) version for no-sew patches — the lite version stays softer and doesn’t gum up my needle as much.
2. Raw Edge apliquet
The fabric shape is stitched down with its edges left unfinished (raw), often using a straight or zigzag stitch. Quick and gives a casual, textured look. I like this one for kids’ projects where a “perfect” finish doesn’t matter as much.
3. Needle-Turn apliquet (Hand Sewing)
Edges are folded under and hand-stitched invisibly. This method takes more practice but gives the smoothest, most polished finish. Best tried after you’re comfortable with the basics. My first needle-turn piece was a small circle for a quilt block, and it took me almost 40 minutes just to get one shape stitched down evenly — now a shape that size takes me about 8 minutes. Curves on flower petals were the hardest part; clipping tiny notches into the seam allowance before turning the edge under made the biggest difference.
Tools and Materials You’ll Need
- Base fabric — cotton works best for beginners (easy to cut and press)
- apliquet fabric scraps — for your shapes/design
- Fusible web (e.g., Wonder Under, Heat n Bond) — for fusible apliquet
- Sharp fabric scissors or a rotary cutter
- Straight pins or fabric clips
- Sewing machine (or needle and thread for hand sewing)
- Iron and ironing board
- Fabric marking pen or chalk
- apliquet pattern or template
How to Do apliquet Step by Step (Fusible Method)
This is the simplest method to start with, and the one I teach every beginner first.
- Choose your design. Pick a simple shape — a heart, star, or leaf — for your first project.
- Trace the shape onto the paper side of the fusible web (mirror image if the shape isn’t symmetrical).
- Cut around the traced shape, leaving a small margin.
- Iron the fusible web onto the back of your apliquet fabric, adhesive side down. Follow the product’s heat and time instructions.
- Cut out the exact shape along your traced line.
- Peel off the paper backing.
- Position the shape on your base fabric where you want it.
- Iron it in place to fuse it firmly.
- Stitch around the edges using a straight stitch, zigzag, or satin stitch to secure it permanently and prevent fraying.
- Press the finished piece flat.
If your shape doesn’t fuse evenly on the first try, don’t worry — that happened to me constantly when I started. On one baby quilt, I rushed the ironing step and only pressed for about 5 seconds instead of the full 10, and by the time I got to the sewing machine, one corner of the shape had already peeled up. I had to re-fuse it before I could stitch. Now I set a timer on my phone for the first few projects, until holding the iron down long enough becomes automatic.
Tips for Beginners
- Start with simple shapes before attempting detailed designs like letters or animals.
- Use 100% cotton fabric — it presses cleanly and doesn’t fray as much as synthetics.
- Always test your fusible web and iron heat on a scrap piece first. This one habit saves the most fabric.
- Go slow when stitching around curves; lift the needle and pivot often.
- Use contrasting thread if you want the stitching to show as a design detail, or matching thread to keep it subtle.
Common Mistakes to Avoid
- Skipping the fuse test — different fabrics need different iron temperatures.
- Cutting shapes too small — small pieces are harder to handle and fuse evenly.
- Not securing raw edges — this causes fraying after washing.
- Rushing the stitching — uneven stitches around curves are the most common beginner issue, and one I still catch myself making when I’m in a hurry.
- Using stretchy or slippery fabric for your first project — it shifts and puckers easily. I learned this the hard way trying to apliquet a satin star onto a t-shirt; it slid under the presser foot the whole time and the star ended up crooked. I switched to quilting cotton for practice pieces after that and never had the problem again.
Frequently Asked Questions
1. What fabric is best for apliquet beginners?
100% cotton is best. It’s easy to cut, presses well, and doesn’t fray or stretch much.
2. Can I do apliquet without a sewing machine?
Yes. Hand-stitched needle-turn apliquet uses only a needle and thread, no machine needed.
3. What is fusible web used for in apliquet?
Fusible web is a heat-activated adhesive that temporarily or permanently bonds fabric shapes to your base fabric before stitching.
4. How do I stop my apliquet edges from fraying?
Use a zigzag or satin stitch around the edges, or choose fusible apliquet, which seals the edge with adhesive first.
5. Is apliquet hard to learn?
No. Fusible apliquet is beginner-friendly and can be learned in one afternoon. Needle-turn apliquet takes more practice but is still learnable with patience.