

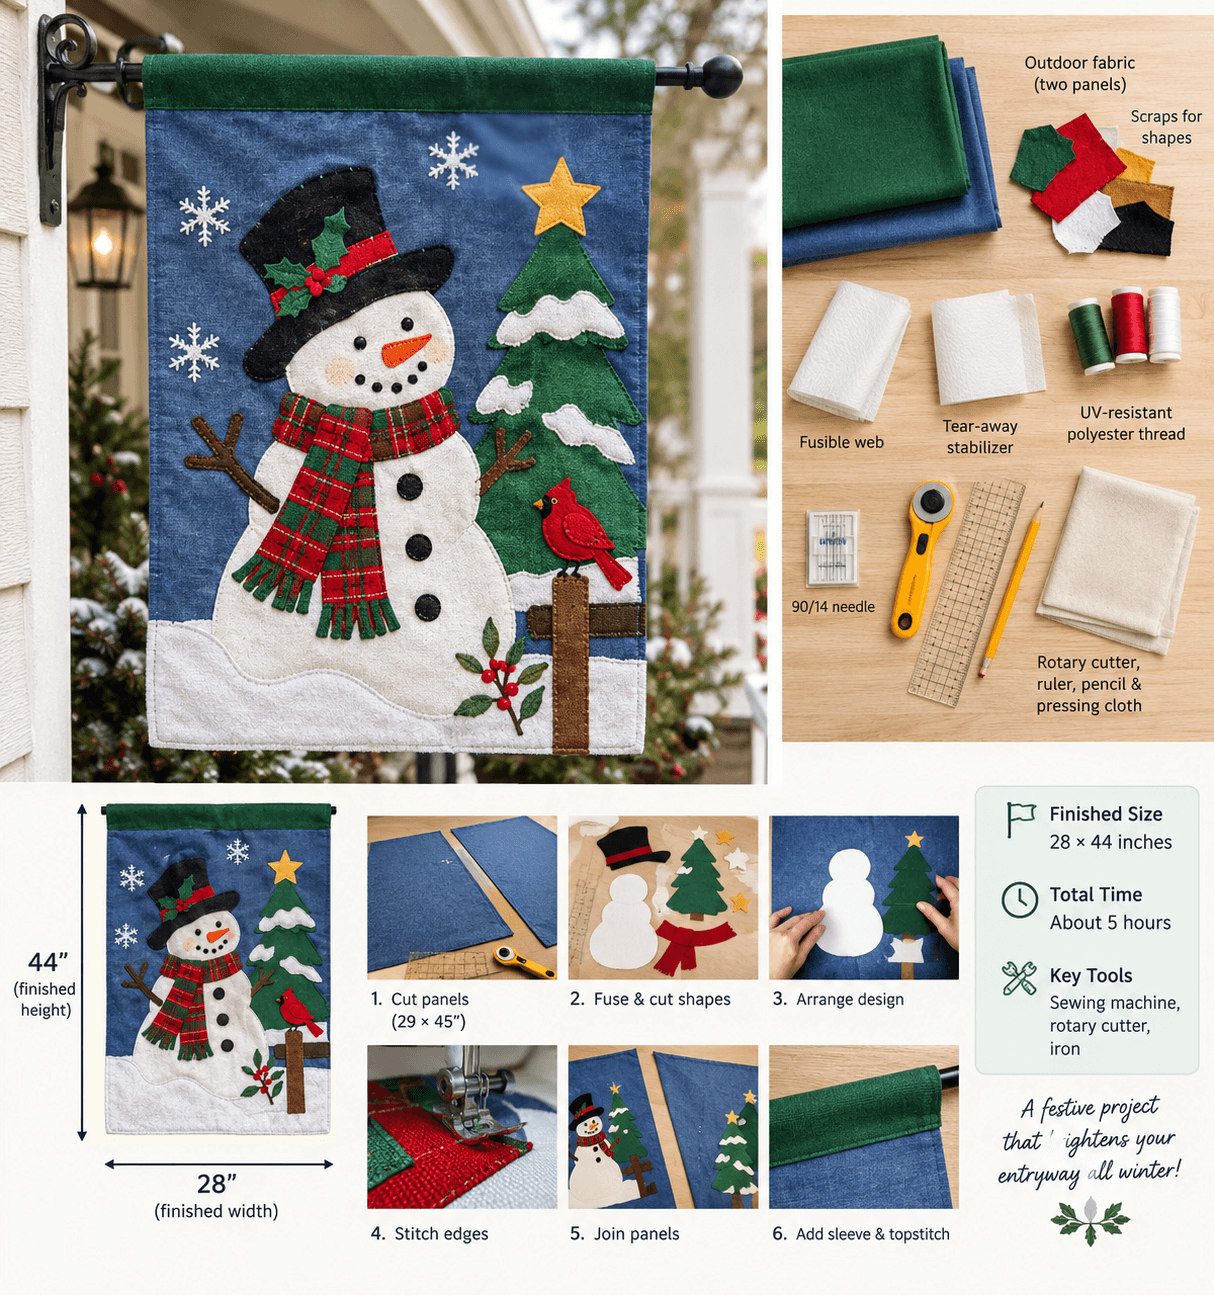
To make an applique Christmas house flag, cut two 29 x 45 inch panels of outdoor fabric, fuse and stitch festive shapes to each, sew the panels together, and add a sleeve along the top. The finished flag measures 28 x 44 inches and takes about 5 hours.
I’ve done applique for a long time, and a house flag is one of my favorite projects. It’s big enough to be fun, simple enough to finish in an afternoon, and it works through a whole winter if you build it right. Here’s how I do it.
Table of Contents
Materials
- 1½ yards of outdoor fabric, such as solution-dyed acrylic or heavy polyester (two panels)
- Scraps for the shapes
- Lightweight paper-backed fusible web
- Tear-away stabilizer
- UV-resistant polyester thread. Cotton thread rots outdoors.
- A 90/14 topstitch needle
- A pressing cloth, rotary cutter, ruler, and pencil
Why Fabric and Thread Matter More Than the Design
Most beginners focus on the motifs. I focus on what holds them on. Sun, wind, and damp break down cotton thread within a season, so I use polyester thread on every flag. I also choose fabric that doesn’t soak up water, since heavy wet cloth drags on the pole.
Synthetic fabrics are heat-sensitive, so I always test my iron on a scrap first. Medium heat and a pressing cloth keep the fabric from shining or melting.
Step-by-Step
1. Cut the panels (20 minutes). Cut two rectangles, 29 x 45 inches. That leaves ½ inch for seams.
2. Prepare the shapes (45 minutes). Trace simple shapes in reverse on the web. Trees, stars, snowmen, and holly work well. Fuse the web to your scraps, cut them out, and peel off the paper.
3. Arrange the design (20 minutes). Lay the shapes on the panel, keeping them 3 inches from the edges. I stand on a chair and look down at the whole thing. Odd numbers of shapes look more natural than even ones.
4. Fuse (15 minutes). Press each shape with a pressing cloth. Hold, don’t slide.
5. Stitch every edge (90 minutes). Place stabilizer under each shape. Use a satin stitch or tight blanket stitch about 2.5 to 3 mm wide. Slow down on curves and pivot with the needle down at points.
6. Repeat on the second panel (45 minutes). Keep text off the flag unless you flip it correctly, since a word on the back will read in reverse.
7. Join the panels (30 minutes). Place them right sides together. Sew around the edges with a ½ inch seam, leaving a 6 inch gap on one side. Clip the corners, turn the flag right side out, and press.
8. Add the sleeve and topstitch (45 minutes). Fold a strip of fabric to make a 3 inch sleeve along the top edge, wide enough for your pole. Stitch it down, then topstitch around the whole flag about ¼ inch from the edge.
Mistakes I See Most Often
- Using cotton thread outdoors
- Skipping the stabilizer, so the satin stitch puckers
- Pressing synthetic fabric too hot
- Making the sleeve too tight for the pole
- Placing shapes too close to the seam
Tips for a Flag That Lasts
Use a small amount of fray sealant on cut ends if your fabric tends to fray. Test your stitch on scraps first. Bring the flag inside during storms, and let it dry fully before storing.
FAQ
What size should a house flag be?
Standard house flags measure about 28 x 40 to 28 x 44 inches.
Can I use cotton fabric?
Yes, but for indoors or a covered porch. Outdoors, synthetic fabric holds up much better.
Do I need an embroidery machine?
No. A regular machine with a satin or blanket stitch is enough.
How long does it take?
About 5 hours for most people, so one long afternoon.
What thread should I use?
UV-resistant polyester thread. It resists sun and moisture far better than cotton.
About the Author: Sara McLean is the creator of AppliquéFits.com and a textile designer who shares practical appliqué, sewing, and fabric-design ideas.