

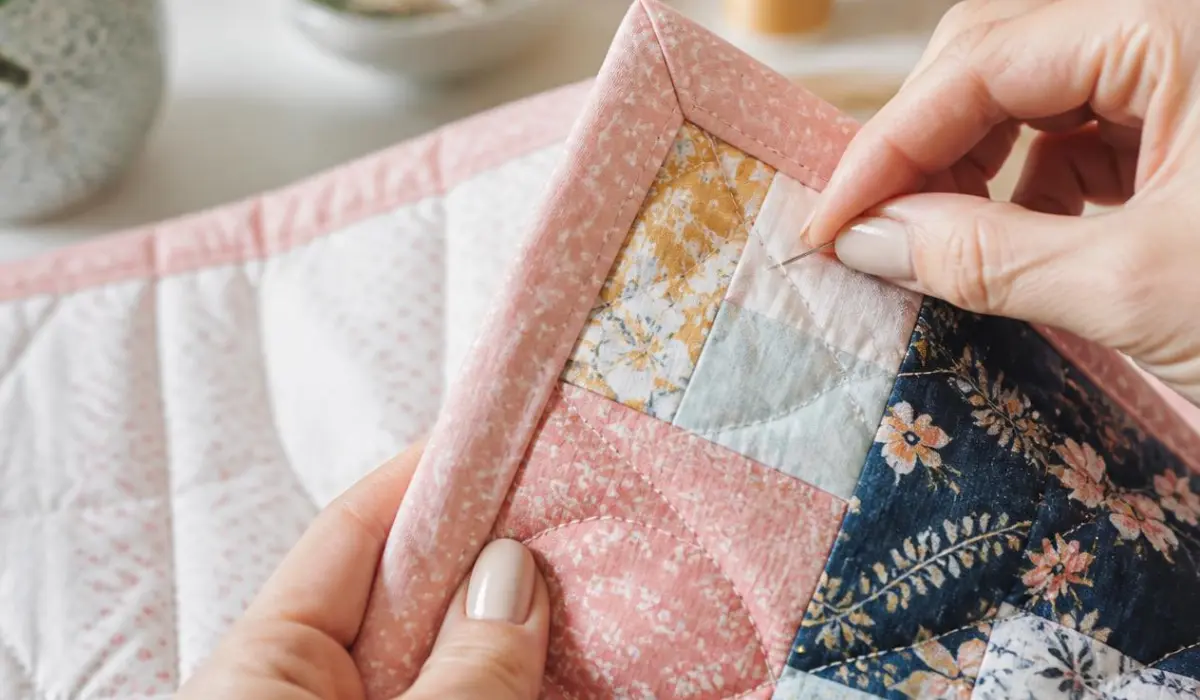
Binding a quilt means sewing a folded fabric strip around the raw edges of your quilt top, batting, and backing to seal them together and protect them from fraying. It’s the last step in finishing a quilt, and it turns your work into a finished, wash-ready piece. This guide walks you through the whole process, from trimming your quilt to sewing the final stitch.
I still remember binding my first quilt — a lap-size scrap quilt I made for my sister. I rushed the corners because I just wanted to be done, and it showed: two of the four corners puckered where the fabric wasn’t square before I started. That quilt taught me the lesson every step below is built around — binding rewards patience, not speed. Every tip in this guide comes from mistakes I’ve made myself, or watched other quilters make and fix, on real quilts, not just theory.
Table of Contents
Why Trust This Guide
This isn’t a rewrite of a single tutorial. It’s built from hands-on binding experience combined with a cross-check of long-running quilting community discussions — the Quilting Board forums, Missouri Star’s Quilting Forum, and dozens of independent quilters’ tutorials — to find where experienced quilters actually agree (and where they don’t) on things like batting stretch, corner bulk, and strip width. Where sources disagreed, that’s called out below so you can make an informed choice instead of just following one person’s preference.
What You’ll Need
- Quilt top, quilted and ready to finish
- Binding fabric (¼–½ yard, depending on quilt size)
- Rotary cutter, cutting mat, and long ruler
- Sewing machine (walking foot recommended)
- Iron and ironing board
- Wonder clips or pins
- Hand sewing needle and thread (if hand-finishing)
- Water-soluble marking pen
Step 1: Square Up Your Quilt
Before you touch your binding fabric, trim your quilt so the edges are straight and the corners are true 90-degree angles. Lay the quilt flat, smooth it out, and use a rotary cutter with a long ruler to trim the excess batting and backing flush with the quilt top. A squared-up quilt is the single biggest factor in a binding that lies flat instead of puckering later.
In my experience, this is the step beginners are most tempted to skip because it feels like it’s “just trimming.” Don’t skip it. Almost every puckering problem I’ve ever had to unpick traced back to a quilt that wasn’t properly squared before the binding went on — not the binding itself.
Step 2: Calculate How Much Binding You Need
This is the step that trips up most beginners, so here’s the simple math with a worked example.
Formula: Perimeter of quilt + 20″ (for corners and joins) ÷ usable fabric width = number of strips needed
Example: Say your quilt measures 40″ x 50″.
- Perimeter = 40 + 40 + 50 + 50 = 180″
- Add 20″ for joins = 200″
- Divide by 40″ (usable width of fabric) = 5 strips
So you’d cut 5 strips at your chosen width. Multiply the number of strips by the strip width to know how much fabric to buy (5 strips x 2.5″ = 12.5″, so about ⅜–½ yard once you round up).
Which strip width should you use?
- 2¼” strips — tighter, less bulky finish. Good for lighter batting and quilts with less loft.
- 2.5″ strips — a little more fabric to wrap the edge. Easier to handle on quilts with thicker batting or bulky seams.
There’s no single “correct” width — pick based on your batting’s thickness, and stay consistent across the whole quilt.
Personally, I default to 2.5″ strips on almost everything I make. I switched from 2¼” a few years ago after fighting with bulky corners on a quilt with wool batting, and I’ve never gone back — the little bit of extra fabric makes wrapping the fold so much easier on tired hands at 10pm.
Step 3: Cut, Join, and Press Your Strips
- Cut your strips across the width of fabric at your chosen width.
- Lay two strips right sides together at a 90-degree angle, overlapping the ends.
- Draw a diagonal line across the overlap with your marking pen and stitch on that line.
- Trim the seam to a ¼” allowance and press it open — this keeps the join from adding bulk.
- Repeat until all strips are joined into one long strip.
- Fold the entire strip in half lengthwise, wrong sides together, and press along its full length. This is your double-fold binding, ready to attach.
Step 4: Attach the Binding to the Quilt Front
- Starting in the middle of one side (never at a corner), align the raw edges of the binding with the raw edge of the quilt.
- Leave an 8–10″ tail unsewn at the start — you’ll need this later to join the ends.
- Sew with a scant ¼” seam allowance, using a walking foot if you have one. This keeps every layer feeding through evenly and helps prevent puckering.
- As you approach a corner, stop sewing exactly ¼” from the edge, backstitch, and lift your needle.
- Fold the binding straight up at a 45-degree angle, then fold it back down so the raw edges line up with the next side. This creates your mitered corner.
- Begin sewing the next side from the very edge, and repeat at each corner.
A trick that took me years to learn: resist the urge to pull the binding taut as you feed it under the needle. I used to stretch it slightly to keep it “neat,” and that’s exactly what gave me wavy edges on my early quilts. Let the walking foot do the work — your hands should just guide, not tension, the strip.
Step 5: Join the Binding Ends
When you get back to within 8–10″ of your starting tail, stop sewing.
- Overlap the two tails and trim so they overlap by exactly the width of your binding strip (e.g., 2.5″ overlap for 2.5″ strips).
- Open both tails, place them right sides together at a 90-degree angle (just like joining your strips), and draw a diagonal line across the intersection.
- Pin and stitch along the line, then trim the seam to a ¼” allowance and press open.
- Refold the binding in half and finish sewing this last section down.
This diagonal join keeps the closing seam flat and nearly invisible — much cleaner than simply overlapping the raw ends.
Step 6: Finish the Back
Fold the binding over the raw edge to the back of the quilt so it just covers your line of machine stitching, and secure it with clips or pins as you go.
- Hand-finishing: Use a blind hem stitch (or a heavier “big stitch” with thicker thread for a decorative look) to sew the fold down invisibly. Fold each corner into a neat miter on the back as you reach it. This is slower but gives a classic, heirloom finish.
- Machine-finishing: Topstitch close to the folded edge from the front, catching the binding on the back as you go. This is faster and more durable — a good choice for quilts that will be washed often, like baby quilts or everyday throws.
Neither method is “more correct” — choose based on how much time you have and how the quilt will be used.
My own rule of thumb: I hand-finish gift quilts and anything meant to be an heirloom, and I machine-finish anything going to a toddler’s bed or a dog’s favorite blanket spot. It’s not about which technique is “better” — it’s about matching the finish to how hard the quilt is actually going to be used.
Bias Binding vs. Straight-Grain Binding
- Straight-grain binding is cut along the fabric’s grain. It’s stable, easy to handle, and the right default for quilts with straight sides and standard 90-degree corners.
- Bias binding is cut at a 45-degree angle to the grain, which gives it stretch. Use it for quilts with curved or scalloped edges — the stretch lets it hug curves smoothly instead of puckering.
If your quilt has straight sides, stick with straight-grain binding — it’s simpler to cut and sew as a beginner.
Common Mistakes and How to Fix Them
- Puckering along the edge: Usually caused by stretching the binding while sewing, skipping a walking foot, or cutting the binding too short or too long for the actual quilt perimeter. Always measure your finished quilt directly rather than trusting a pattern’s numbers, and let the walking foot pull all the layers through at the same rate instead of pushing or pulling the fabric yourself.
- Bulky or uneven mitered corners: Usually from too much fabric bunching inside the fold. Before sewing, you can trim a small triangle of batting and backing from each corner to remove the extra bulk, and take your time folding the miter rather than rushing it.
- Binding too loose or too tight at the join: A gap means you left too much overlap when joining the ends; puckering at the join means the overlap was too short. Measure the overlap to match your strip width exactly, and do a quick test-fold before stitching to check nothing is twisted.
- Cutting strips too short: This forces awkward extra seams partway through. Always add the full 20″ buffer to your perimeter measurement before dividing into strips, not just the bare perimeter.
FAQ
How much fabric do I need for quilt binding?
Take your quilt’s perimeter, add 20″ for joins, divide by your fabric’s usable width (usually about 40″) to get the number of strips, then multiply strips by strip width to get total fabric needed. For most throw-size quilts, ⅜ to ½ yard is enough.
Should I bind by hand or by machine?
Both are valid. Hand-finishing gives an invisible, heirloom look but takes longer. Machine-finishing is faster and more durable, making it a better choice for quilts that will be washed frequently.
Why does my quilt binding keep puckering?
The most common causes are a stretched binding strip, no walking foot, or a binding length that doesn’t match your quilt’s actual perimeter. Square up your quilt first, measure directly rather than trusting a pattern, and let the walking foot feed the layers evenly.
What width should I cut my binding strips?
2¼” strips give a slimmer finish and suit thinner batting; 2.5″ strips are easier to wrap around thicker batting or bulkier seams. Either is correct — just stay consistent across the whole quilt.
Do I need bias binding for every quilt?
No. Bias binding is only necessary for quilts with curved or scalloped edges. Straight-sided quilts are easier to bind with straight-grain binding.
Written By Sara McLean | Reviewed for technique accuracy by a quilting instructor