

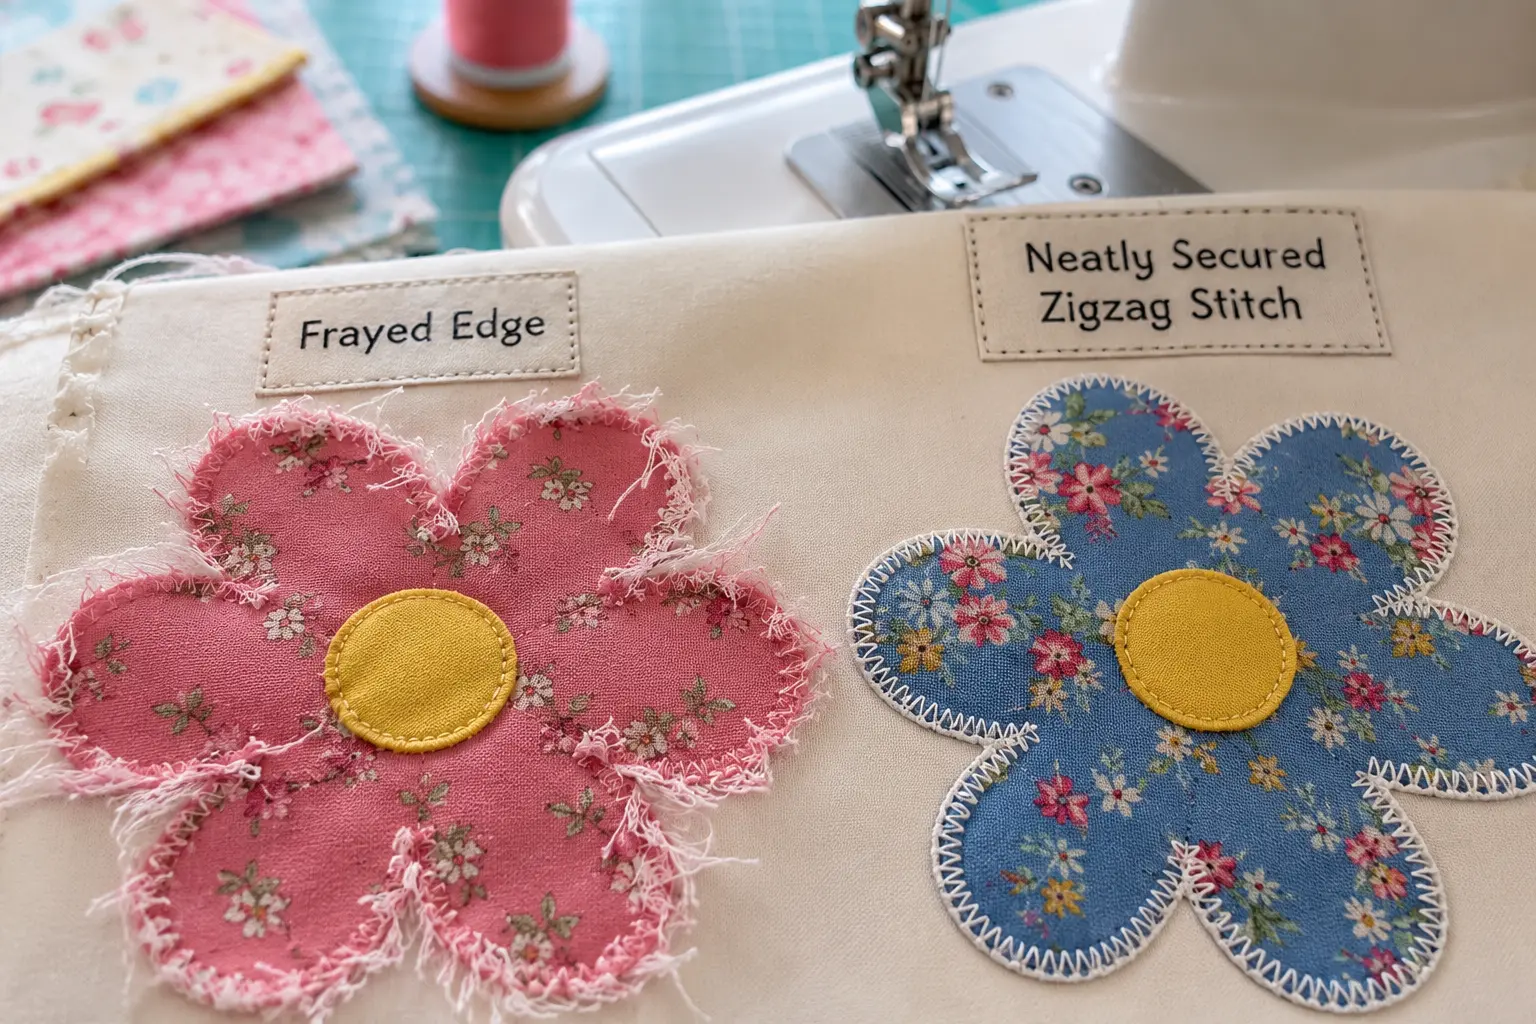
If your appliqué edges are fraying, the fix is to use one or more of five methods: stabilizing the fabric with fusible web, choosing a tighter-weave fabric, stitching edges properly (zigzag or blanket stitch), sealing raw edges with a fray-prevention liquid, and cutting cleanly with sharp scissors.
Fraying is probably the most common thing beginners get frustrated by in applique, especially raw-edge applique, where the fabric edge is left exposed on purpose. It looks intimidating the first time it happens, but honestly, it’s one of the easier problems to solve once you know what’s causing it. Here’s what actually works, roughly in order of how much it matters.
Table of Contents
Why Applique Fabric Frays in the First Place
Before jumping to fixes, it’s worth knowing what you’re actually up against:
- The fabric has a loose weave, so the fibers pull apart at any cut edge
- There’s no stabilizer holding the fibers together
- You stitched with a plain straight stitch, which doesn’t lock the edge down at all
- The scissors were dull, which tears the weave instead of cutting it cleanly
- The piece has been through a lot of wash cycles, and the agitation slowly works threads loose
Usually it’s a combination of two or three of these, not just one.
Method 1: Fusible Web or Interfacing (Start Here)
This is the one that matters most. If you only do one thing on this list, do this.
Fusible web — Heat n Bond is the popular one — bonds to the back of your fabric before you even cut the shape out. Once it’s ironed on, the fibers are locked together at a structural level, so there’s nothing to unravel even if you never touch it with a needle again.
How to do it:
- Trace your shape onto the paper side of the fusible web.
- Cut around it roughly (doesn’t need to be precise yet) and iron it onto the back of your fabric, following whatever heat setting the packaging says.
- Now cut the exact shape out — after fusing, not before. This matters more than people expect. A fused edge frays a lot less than a raw one.
- Fuse the whole thing onto your background fabric.
What makes this different from the other methods is that the bond is permanent. It’s not just holding things together while you sew — it keeps working through every wash after that.
Method 2: Pick a Fabric That Doesn’t Fight You
Honestly, half the battle is decided before you even thread a needle. Some fabrics just don’t fray much, and some fray no matter what you do.
Good choices: quilting cotton with a tight weave, batiks (these barely fray at all), and felt or fleece, which don’t fray in the traditional sense because there’s no woven thread structure to come apart. Synthetic blends tend to behave well too.
What to avoid, especially for raw-edge work: loosely woven cotton, linen blends, and anything that’s already a bit worn — old fabric frays fast, stitching or not.
Method 3: Use the Right Stitch
This one surprises a lot of beginners — the stitch you pick changes the outcome more than almost anything else.
A straight stitch sewn a little ways from the edge (say 1/8″ to 1/4″) will fray over time. Some quilters actually want this — it’s the whole basis of the “shabby chic” look, where the frayed edge is the point. But if you’re not going for that, skip it.
A zigzag or satin stitch encases the raw edge as you sew, which cuts fraying down to almost nothing. A blanket stitch does something similar and is the go-to if you’re hand-stitching rather than using a machine.
If you actually want the frayed look — go ahead and use the straight stitch, skip the fusible web step above, and let it soften with washing. That’s a legitimate style choice, not a mistake.
Method 4: Seal the Edges, Especially on Curves and Points
Curves and inner points are where fraying shows up first, and a small dab of a fray-prevention liquid handles them well.
Apply it right to the cut edge, particularly on any clipped curves. Try to keep it inside your seam allowance — these products can darken the fabric slightly where they touch, and you don’t want that showing on the front. Let it dry all the way before you stitch over it.
A little goes further than you’d think. Over-applying tends to make the edge stiff, which isn’t fun to sew through.
Method 5: Cut Cleanly
Easy to overlook, but a rough cut sets you up for fraying before you’ve done anything else.
Use sharp applique scissors or a fresh rotary blade — dull ones tear the fibers rather than slicing through them, which loosens the weave right from the start. Go slow around curves instead of rushing. And when you clip inner curves, only clip 3–4 threads in from your stitch line. Clipping too deep is a really common way people accidentally cause more fraying, not less.
Mistakes Worth Avoiding
- Skipping the stabilizer because the fabric “seems tight enough” — it’ll still fray eventually
- Clipping curves too close to the stitch line
- Using scissors that have gone dull without realizing it
- Piling on too much fray sealant, which can harden and darken the fabric
- Washing the piece before the fusible web or sealant has fully cured
FAQ
Does raw-edge applique always fray a little?
A bit, yes — but fusible web combined with a zigzag or blanket stitch gets it down to almost nothing, even through repeated washing.
Is Fray Check safe on any fabric?
Mostly, but it can darken lighter fabrics slightly. Test it on a scrap first, and keep it inside your seam allowance.
What’s the easiest stitch for a beginner to prevent fraying?
Zigzag. It’s more forgiving to control on a machine than a blanket stitch, and it still does a solid job protecting the edge.
Can I prevent fraying without a machine?
Yes — a hand blanket stitch fully covers the edge, and pairing it with fusible web underneath works just as well as machine stitching.
Do felt or fleece appliques need any fray prevention?
Not really. They don’t have a woven structure to unravel in the first place, so raw edges are fine as-is.
Written By Sarah McLean