

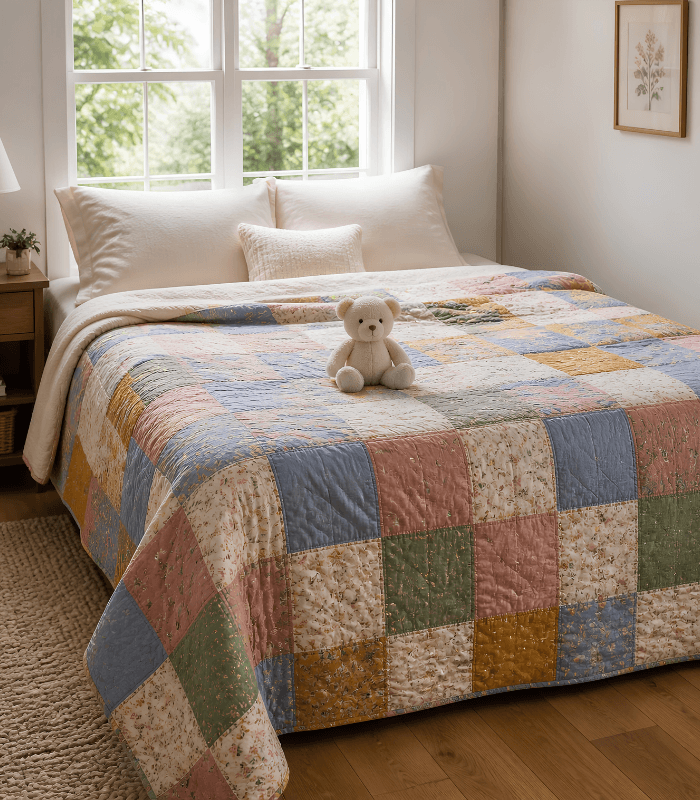
I’ve made square quilts as first projects for total beginners in my workshops, and I’ve made them for myself after years of piecing, just to focus purely on color. Every block is made the same simple way — no set-in seams, no bias to fight — so the learning curve is genuinely short. What surprised me is that the results still look intentional and considered, even though the construction couldn’t be more basic.
Table of Contents
What You’ll Need
- Assorted quilting cotton in your chosen colors
- A rotary cutter, ruler, and mat
- A design wall or clear floor space
- Batting
- Backing fabric
- Quilting thread
How I Piece Mine Together
- Choose your fabrics first, before deciding on a layout — the color story is what this pattern lives or dies on.
- Cut your squares to a consistent size, whether that’s a small 4″ grid or an oversized 10″ to 20″ format.
- Lay every square out on a design wall or floor before sewing anything together.
- Rearrange until no single color or print clumps in one area of the layout.
- Sew your squares into rows, pressing seams in alternating directions row to row.
- Join the rows together, matching seams carefully as you go.
- Square up your finished top before layering.
- Layer the top, batting, and backing, baste it, and quilt it however you like.
- Bind the edges to finish.
A Few Lessons From My Quilting Table
- Choosing fabric before layout keeps the color story from feeling like an afterthought, which is easy to let happen with such a simple block.
- Oversized squares, in the 10″ to 20″ range, turn this pattern into something closer to a color-field composition than a repetitive grid.
- Because the piecing is so simple, this is the pattern where I invest the most in the actual quilting design.
- Laying every square out before sewing catches color imbalances that are nearly invisible fabric by fabric.
Mistakes I’ve Made Along the Way
- I once picked fabrics I liked individually but had never tested side by side, and the finished top looked flat despite perfect piecing.
- Skipping the design-wall step on an early square quilt meant two similar prints ended up right next to each other.
- Pressing every seam in the same direction across a large top made my rows bulky and harder to match cleanly.
Questions I Get Asked
What size squares work best for beginners?
I usually start new quilters with a 6″ to 10″ finished square — big enough to sew quickly, small enough to still feel like a real pattern.
Is a square quilt really a good project for experienced quilters?
Yes, and I’d argue it’s underrated. With no piecing tricks to hide behind, it puts all the pressure on color choice, which is a real skill on its own.
Do I need a longarm machine to finish one well?
Not at all, though because the pieced top is so simple, I do like to use more detailed quilting designs when I have access to one.
Can I mix square sizes in the same quilt?
Yes, though I’d recommend sticking to multiples of your smallest square so everything still lines up cleanly at the seams.
How much fabric do I need for a throw-size square quilt?
For a throw around 50″ x 60″, I’d plan on roughly 3 to 4 yards total, depending on how many different fabrics you’re using.
By Sara McLean