

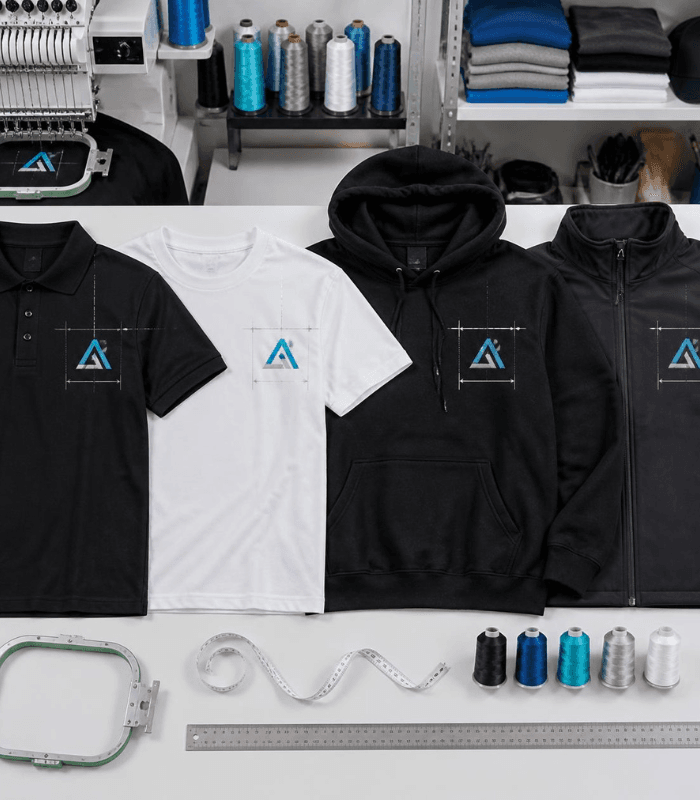
Getting embroidery placement wrong is the fastest way to make a $30 shirt look like a $5 one. Half an inch too high, too low, or off-center, and even the cleanest stitching reads as amateur. This guide pulls together the placement standards used by production embroiderers, apparel decorators, and digitizers, and organizes them the way you actually need them: by garment, by size, and by design location — with exact measurements, not vague “eyeball it” advice.
Table of Contents
Why Placement Matters More Than Stitch Quality
A logo can be perfectly digitized with clean underlay, correct density, and flawless thread tension — and still look wrong if it sits a half-inch too high on the chest or drifts off-center. The eye catches asymmetry before it catches stitch quality. That’s why professional shops measure every placement rather than relying on instinct, and why the placement standards below are given as measured ranges, not single numbers — garments vary by cut, brand, and fabric stretch, so a range lets you adjust for what’s actually in front of you.
Tools You Need Before You Measure
- A clear acrylic ruler or T-square — flexible tape measures distort on stretchy fabric.
- A printed, full-size paper template of the design (most digitizing software will print one to scale). Pin or tape it to the garment before hooping so you can see the actual result, not just numbers on paper.
- Water-soluble or air-soluble marking pen, or tailor’s chalk for dark fabrics.
- A flat, hard surface to lay the garment on — placement measured on a bunched or hanging garment is never accurate.
- A placement ruler/guide (commercial rulers sold for embroidery marking speed this up considerably for high-volume work).
Always lay the garment flat, smooth out wrinkles, and button or zip it closed before measuring — a garment measured open will shift once closed.
Left Chest Placement: The Industry-Standard Measurements
Left chest is the most common embroidery placement in the industry, and also the one most often eyeballed instead of measured — which is exactly why so many logos end up crooked or too close to the armpit. The standard reference points are the left shoulder seam (where it meets the collar) and the center front placket.
Adult Sizing (Men’s and Women’s)
| Size | Down from shoulder seam | From center/placket |
|---|---|---|
| Women’s S–M | 3″ – 3.5″ | 3″ – 4″ |
| Women’s L–XL | 3.5″ – 4″ | 4″ – 5″ |
| Men’s S–M | 3.5″ – 4″ | 3.5″ – 4.5″ |
| Men’s L–XL | 4″ – 4.5″ | 4.5″ – 5.5″ |
| Men’s 2XL–3XL | 4.5″ – 5″ | 5.5″ – 6.5″ |
As a simpler working rule for a standard adult tee or polo: measure down 3.5″ to 4.5″ from the shoulder seam, and center the design between the placket and the side seam — roughly 1.25″ to 2″ to the right of the center front. Scale the drop and offset up for larger sizes and hoodies (add 1″–2″ to both measurements for heavyweight hoodies and fleece, since the garment sits differently on the body).
Youth and Children’s (Sizes 4–16)
- Down from shoulder seam: 3.5″ – 4.5″ (same as adult small — youth chest proportions are closer to adult small than they are to toddler sizing)
- From center/placket: 1.25″ – 2″
Infant and Toddler (Newborn – 5T)
- Down from shoulder seam: 3″ – 5″, scaling with size (3″ for newborn, up to 5″ for 4T–5T)
- From center/placket: 2″ – 3.5″
- Design width: keep under 3″, since a design sized for an adult chest will overwhelm a toddler-sized garment and skew off the side seam.
With a Chest Pocket
Never measure straight down from the shoulder when there’s a pocket — it almost always puts the design too low or overlapping the pocket opening, which distorts under wear and makes the pocket unusable. Instead:
- Center the design above the pocket, roughly 0.5″–1″ above the top seam of the pocket.
- Keep design height under 2″ so it doesn’t crowd the collar.
- For designs meant to sit on the pocket itself, center them and keep the design well within the pocket’s stitched edges — never let stitching cross the pocket opening.
Left Chest Sizing by Design Width
Design size, not just placement, affects how professional a left-chest logo looks:
- Standard adult left chest logo: 3.5″–4″ wide, no taller than 4″
- Youth left chest logo: 2.5″–3″ wide
- Cap and beanie logos: typically 2″–2.5″ wide to fit the curved surface without distortion
Full-Front and Center-Chest Placement
For designs meant to sit centered on the chest rather than to the left:
- Position the top of the design 2″–4″ below the bottom of the collar, centered between the left and right side seams.
- Adult full-front designs typically run 8″–11″ wide; youth sizes scale down to 6″–9″ wide.
- Avoid stitch counts above roughly 80,000 on a single chest placement — extremely dense embroidery stiffens the fabric enough to feel uncomfortable and can cause puckering, regardless of how well it’s digitized.
Back Placement (Upper Back and Full Back)
| Placement | Drop from collar | Width guide |
|---|---|---|
| Upper back (small logo/name) | 2″–4″ | Adult: up to 12″ wide; Youth: up to 10″ wide |
| Full back | 3″–5″ | Adult: 11″–13″ wide; Youth: 9″–11″ wide |
Center the design between the shoulder seams. For jacket backs specifically, measure 3″–5″ down from the shoulder seam (not the collar) since jacket collars sit differently than t-shirt collars.
Sleeve and Cuff Placement
- Sleeve logos: centered on the sleeve, roughly 2″–3″ below the shoulder seam for a standard adult short sleeve. On long sleeves, this shifts to 3″–4″ to clear the seam construction.
- Cuffs (monograms): 0.75″–1″ to the right of the buttonhole, 0.25″ above the cuff edge, oriented so the monogram faces away from the wearer when the arm is at rest. Toddler and youth cuffs use a slightly larger offset (around 1″) because the cuff proportion is smaller.
- Knit cap cuffs: centered horizontally, embroidered on the inside of the folded cuff so it displays right-side-out once folded up.
Placement on Stretch, Knit, and Performance Fabrics
Stretch fabrics (athletic wear, fitted polos, performance tees) need adjusted placement logic because the garment changes shape between “flat on the table” and “worn on a body”:
- Measure the garment with a light stretch applied, not fully relaxed — a design placed on relaxed stretch fabric will sit higher and more central once worn.
- Use a firm cutaway backing rather than tearaway; stretch fabric without adequate stabilization will distort around the stitching (the industry term is “pucker”) no matter how accurate the placement was.
- On performance polos specifically, shift the horizontal offset slightly wider than a standard cotton polo — spandex-blend fabric pulls the design toward center as the wearer moves.
Common Placement Mistakes That Give Away Amateur Work
- Measuring from the wrong reference point. Measuring from the collar seam instead of the shoulder/collar intersection throws off every subsequent measurement — always confirm which landmark a spec is measured from before marking.
- Ignoring pockets. A design placed using standard left-chest measurements on a pocketed shirt will frequently land partly over the pocket opening.
- Not accounting for garment stretch. A t-shirt measured flat and unstretched will shift once worn, especially on ribbed or performance knits.
- Skipping the paper template step. Numbers on a spec sheet don’t always look right on an actual body — printing and pinning a full-size template catches errors before you hoop.
- Using the same measurements across all sizes. A logo placed 4″ down on a men’s small and a men’s 3XL using identical measurements will look correctly placed on one and noticeably low on the other.
- Placing too low out of caution. When in doubt, err slightly higher — low placements drift toward the armpit as the garment settles and read as a mistake more than high placements do.
Backing, Stabilizer, and Topping Basics (Why They Affect Placement Too)
Placement accuracy is only half the job — the wrong backing can shift a perfectly measured design during stitching:
- Cutaway backing — stays permanently behind the stitching; best for knits, stretch fabric, and anything that will be worn and washed repeatedly, since it keeps the design stable long-term.
- Tearaway backing — removed after stitching; suited to stable wovens where the back of the stitching won’t be visible or under stress, like towels or tote bags.
- Topping (water-soluble film) — placed on top of fabrics with raised nap (fleece, terry, corduroy) so stitches don’t sink into the fibers and lose definition.
- Spray adhesive on backing prevents it from shifting inside the hoop during hooping, which is one of the more common causes of a design landing slightly off from where it was measured and marked.
Quick-Reference Placement Chart
| Garment / Area | Measurement |
|---|---|
| Adult left chest, no pocket | 3.5″–4.5″ down from shoulder seam; 1.25″–2″ right of center |
| Adult left chest, with pocket | 0.5″–1″ above pocket, centered |
| Youth (4–16) left chest | 3.5″–4.5″ down; 1.25″–2″ from center |
| Infant/toddler left chest | 3″–5″ down (scale by size); 2″–3.5″ from center |
| Full front / center chest | 2″–4″ below collar, centered |
| Upper back | 2″–4″ below collar, centered |
| Full back | 3″–5″ below collar, centered |
| Jacket back | 3″–5″ down from shoulder seam, centered |
| Sleeve | 2″–4″ below shoulder seam, centered |
| Cuff monogram | 0.75″–1″ right of buttonhole, 0.25″ above cuff edge |
| Knit cap cuff | Centered on cuff, embroidered inside-out |
Frequently Asked Questions
How far down should a left chest logo be on a t-shirt?
For a standard adult small-to-medium t-shirt, measure 3.5″ to 4″ down from where the left shoulder seam meets the collar. Larger sizes need proportionally more drop — up to 5″ on a men’s 2XL–3XL.
Where does embroidery go on a shirt with a pocket?
Center the design above the pocket, roughly 0.5″ to 1″ above the pocket’s top seam, rather than measuring down from the shoulder — pocket placement takes priority over standard chest measurements.
How do I place embroidery on a onesie or infant garment?
Measure 3″ to 5″ down from the shoulder/collar intersection depending on the size (3″ for newborn up to 5″ for 4T–5T), and keep the design under 3″ wide so it doesn’t overwhelm the smaller garment.
Does left chest placement change for hoodies versus t-shirts?
Yes. Hoodies sit differently on the body and have thicker fabric at the neckline, so add roughly 1″–2″ to both the vertical drop and horizontal offset compared to a standard t-shirt.
What’s the standard size for a left chest logo?
Most professional left chest logos run 3.5″ to 4″ wide and no taller than 4″ for adult garments, scaling down to 2.5″–3″ wide for youth sizes.