

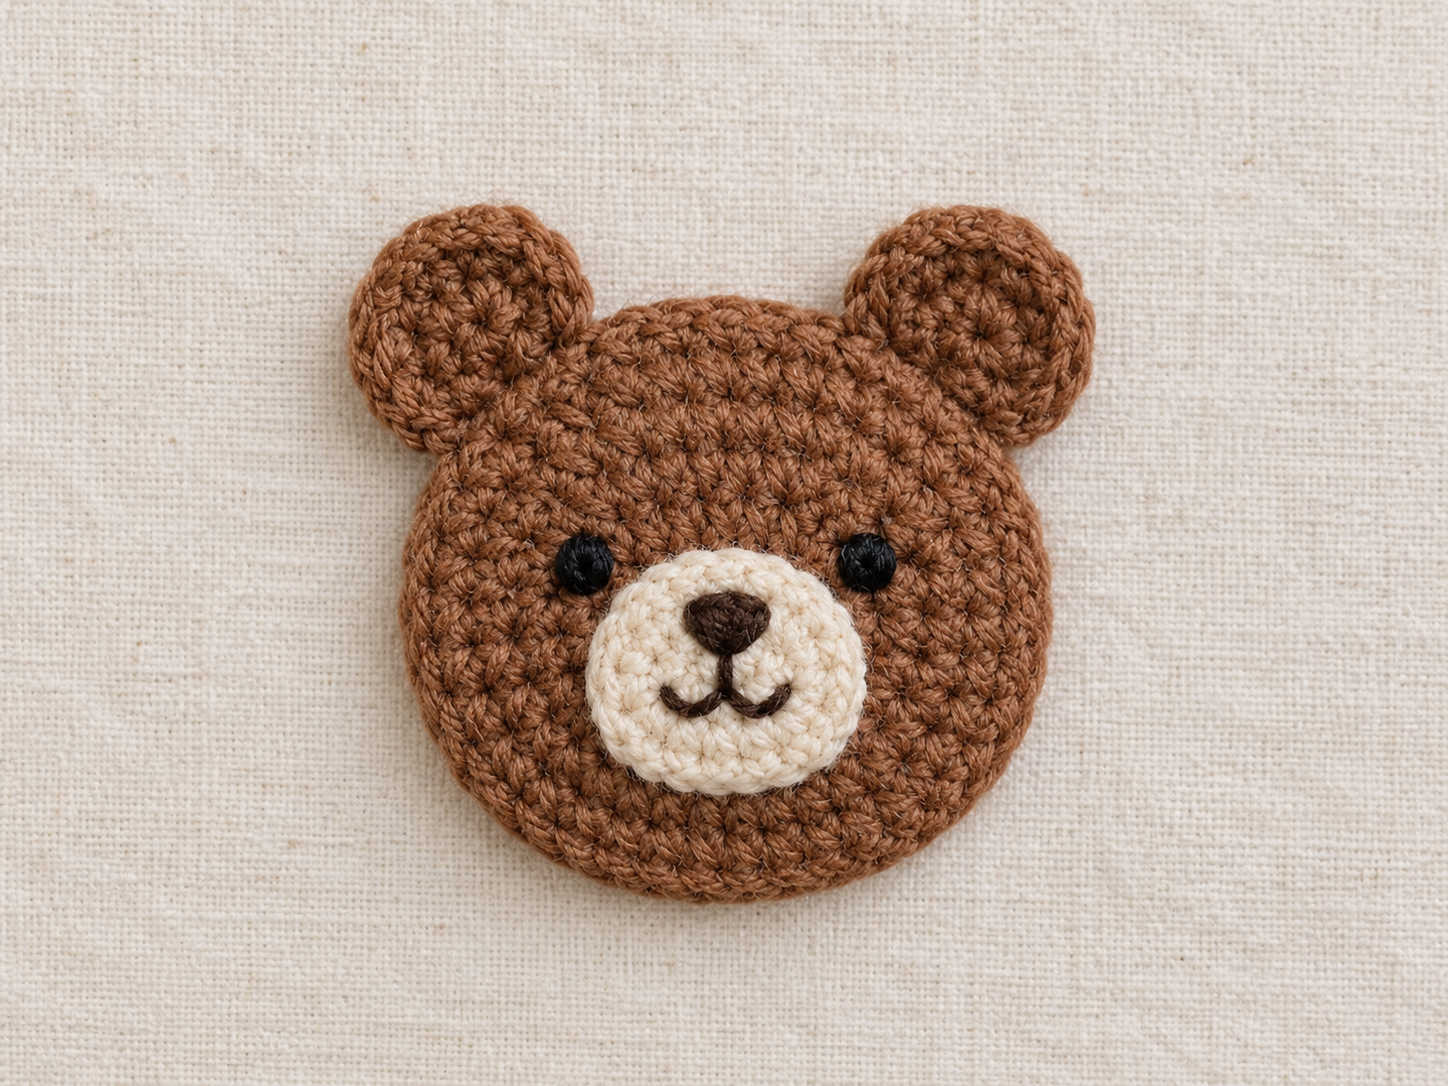
This free crochet bear appliqué is a flat brown head with two round ears and a cream muzzle, all in single crochet. It’s beginner friendly, takes about 45 minutes the first time, and measures about 2.75 inches wide.
Table of Contents
Materials
- Brown worsted yarn, about 8 yards
- Cream worsted yarn, about 2 yards
- Dark scrap for the face
- 4 mm (US G-6) hook, yarn needle, scissors, stitch marker
A 4 mm hook is smaller than most worsted labels suggest. Tight stitches keep the bear flat and gap free.
- Size: about 2.75 inches wide, 3 inches tall with ears.
- Gauge: doesn’t matter; mine is about 4 to 4.5 sc per inch.
- Time: about 45 minutes the first time, 30 after that.
- Total: 198 stitches.
US terms. Work in a spiral without joining. Sc = single crochet (UK double crochet), inc = 2 sc in one stitch, MR = magic ring.
Steps
Step 1: Crochet the Head
| Round | Instructions | Stitches |
|---|---|---|
| 1 | MR, 6 sc | 6 |
| 2 | Inc in every stitch | 12 |
| 3 | (Sc in next st, inc) 6 times | 18 |
| 4 | (Sc in next 2 sts, inc) 6 times | 24 |
| 5 | (Sc in next 3 sts, inc) 6 times | 30 |
| 6 | (Sc in next 4 sts, inc) 6 times | 36 |
Use brown. Sl st, fasten off, leave a 10 inch tail. If the circle ruffles, you added a stitch. If it cups, you missed an increase.
Step 2: Make the Ears and Muzzle
Ears (make 2, brown): MR, 6 sc. Round 2: inc in every stitch (12). Sl st, fasten off, leave an 8 inch tail.
Muzzle (cream): MR, 6 sc. Round 2: inc in every stitch (12). Round 3: (sc in next st, inc) 6 times (18). Fasten off with an 8 inch tail.
Step 3: Assemble and Stitch the Face
- Ears: sew them about 6 stitches either side of top center, overlapping the head edge by 2 stitches.
- Muzzle: center it about 2 rounds below the middle and whip stitch around.
- Nose: satin stitch a small oval, about 3 stitches wide and 2 rows tall, on the top of the muzzle.
- Mouth: one straight stitch down from the nose, then two small curves outward.
- Eyes: two small stitches, 3 stitches either side of the center line and one round above the muzzle.
Step 4: Sew It Onto Your Project
Use the long brown tail and whip stitch around the head, catching the top loops of Round 6 and one strand of the fabric. Keep stitches relaxed so nothing puckers.
Tips From My Own Experiments
- Pin the eyes first. I pin them with spare yarn before stitching. My first bear’s eyes were too far apart, and it looked permanently surprised.
- Skip safety eyes on baby items. A friend wanted a blanket with “nothing that could come off,” so I embroider the face and sew every piece with small stitches.
- Mini bear (about 1.75 inches): stop the head after Round 4, the ears after Round 1 and the muzzle after Round 2.
- Large bear (about 3.5 inches): add head Round 7, (sc in next 5 sts, inc) 6 times (42), and Round 8, (sc in next 6 sts, inc) 6 times (48). Add one more increase round to each ear and the muzzle.
Common Mistakes
- Ears sewn on top of the head look like a hat, so tuck them behind the edge.
- A muzzle bigger than 18 stitches takes over the face.
- A hook that’s too big leaves gaps and makes the bear floppy.
FAQs
Is this pattern really free?
Yes, it’s all on this page.
Can a beginner make it?
Yes: magic ring, single crochet, increases and basic embroidery.
Is it safe for babies?
Embroider the face, sew securely, and check the stitching after washing.
Final Thoughts
This bear is small, flat and forgiving, which is why I keep making it. Stitch one up, pin it on before you commit, and give it a good look. If yours turns out differently, tell me in the comments so I can improve the pattern.
About the Author: Sara McLean is the creator of AppliquéFits.com and a textile designer who shares practical appliqué, sewing, and fabric-design ideas.