

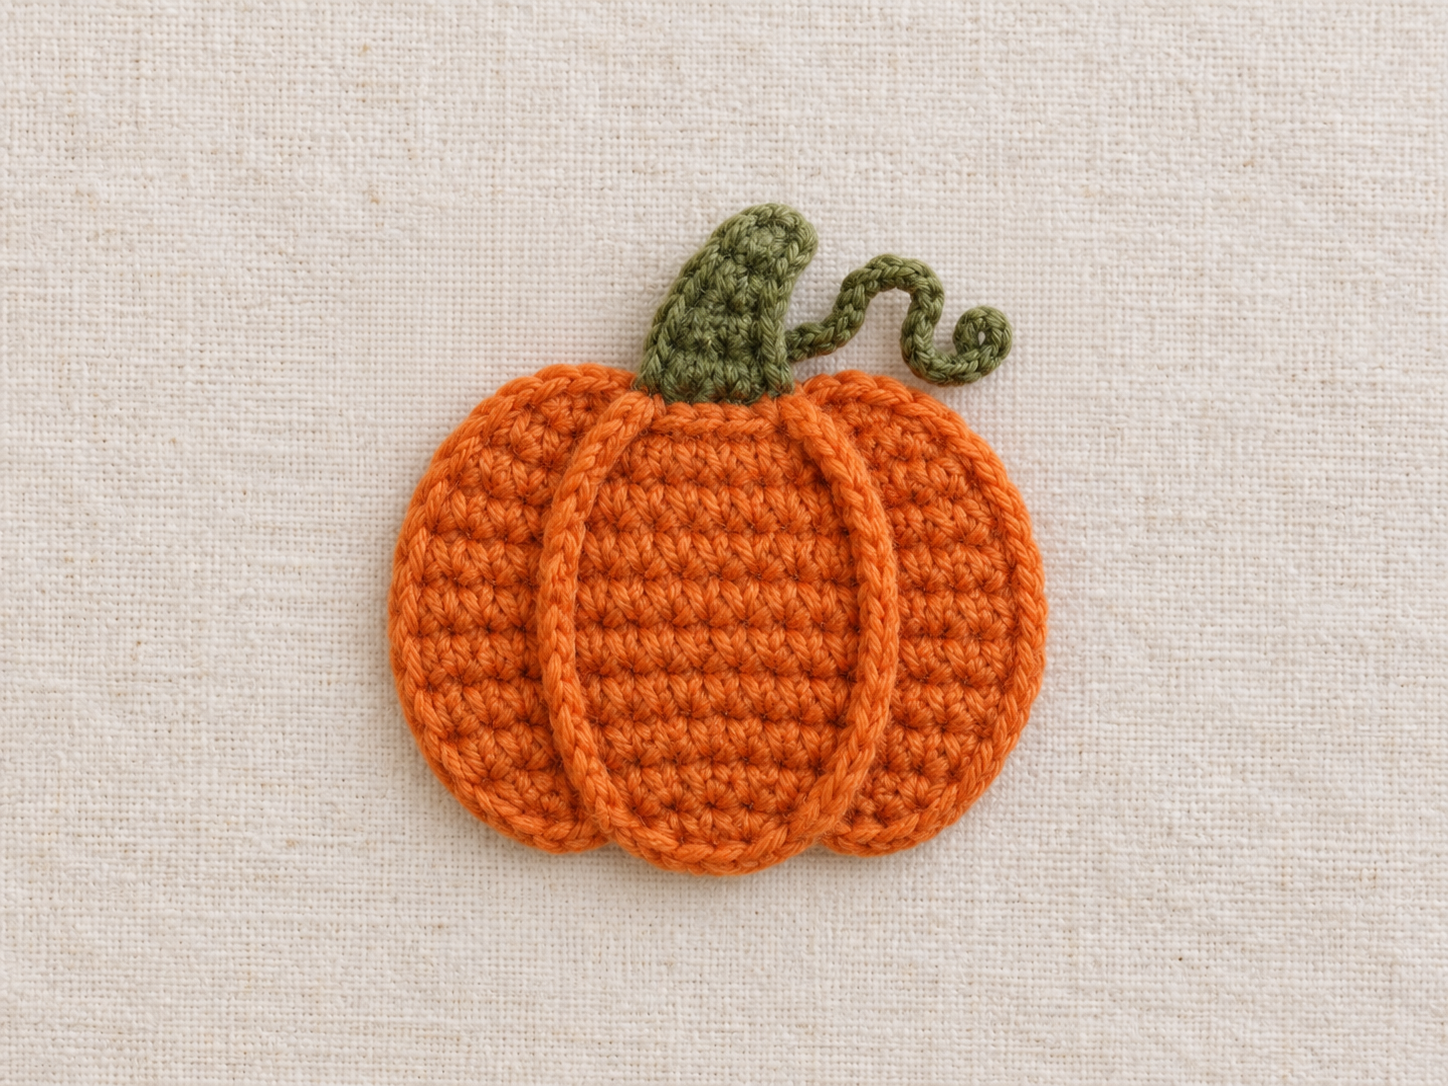
This free crochet pumpkin appliqué is a flat orange circle worked in six rounds of single crochet, shaped with three slip stitch ribs and finished with a green stem. It’s beginner friendly, takes under 15 yards of worsted yarn, and measures about 3 inches wide.
Table of Contents
Why I Make This Pumpkin Every Fall
Every October I’m stuck with orange scraps and no plan. My first pumpkin was a puffy mess of post stitches. It curled at the edges and wouldn’t sew down flat. So I went the other way: a tight, flat single crochet circle, with the ribs added afterward. It worked on the first try. I’ve since stitched these onto beanies, a tote bag, dishcloths and a cardigan pocket, and the flat shape holds up to washing.
Materials
- Orange worsted weight yarn (under 15 yards)
- A scrap of green yarn
- 4 mm (US G-6) hook, yarn needle, scissors, stitch marker
That 4 mm hook is smaller than most worsted labels suggest. It’s deliberate: tight stitches keep the pumpkin flat and gap free.
Pattern Notes
US terms. Work in a spiral without joining, and mark the first stitch of each round. Sc = single crochet (UK double crochet), inc = 2 sc in the same stitch, sl st = slip stitch. Stitch counts are checked for every round.
Finished Size, Gauge and Time
- Finished size: about 2.75 to 3 inches (7 to 7.5 cm) wide, plus a stem about 3/4 inch (2 cm) tall.
- Gauge: it doesn’t matter for an appliqué. With this yarn and hook my single crochet runs about 4 to 4.5 stitches per inch. Tighter stitches make a smaller pumpkin, looser ones a bigger one.
- Total time: about 40 minutes for your first pumpkin (body 20, ribs 10, stem and tendril 10). Once you know the steps, expect 25 to 30 minutes.
Step 1: Crochet the Body
| Round | Instructions | Stitches |
|---|---|---|
| 1 | Magic ring, 6 sc | 6 |
| 2 | Inc in every stitch | 12 |
| 3 | (Sc in next st, inc) 6 times | 18 |
| 4 | (Sc in next 2 sts, inc) 6 times | 24 |
| 5 | (Sc in next 3 sts, inc) 6 times | 30 |
| 6 | (Sc in next 4 sts, inc) 6 times | 36 |
Sl st, fasten off, and leave a 10 inch tail for sewing. The circle should lie flat. If it ruffles, you added a stitch. If it cups, you missed an increase.
Step 2: Add the Ribs
The ribs are three surface slip stitch lines that share the same bottom and top points. Use orange, or a slightly darker shade.
- Make a slip knot and insert the hook from the front at the bottom edge, between two Round 6 stitches. Pull up a loop. This is the bottom point.
- Center rib: Keep the yarn behind the work. Insert the hook one round further in, then pull a loop through the fabric and the loop on your hook. Repeat in a straight line up the middle until you reach the opposite edge, the top point. That’s about 11 slip stitches.
- Left rib: Without fastening off, curve back down to the bottom point, bowing left. At its widest it sits about 3 stitches from the center rib. Expect 11 to 12 slip stitches.
- Right rib: Curve back up to the top point, bowing right by the same amount. Again about 11 to 12 slip stitches.
- Fasten off, pull the tail to the back, and weave it in.
Pull every slip stitch snug so the pumpkin puckers along the ribs. My first ribs were loose and looked like pencil lines.
Step 3: Make the Stem and Tendril
Stem (green)
- Ch 4.
- Row 1: Sc in the 2nd ch from the hook and in each of the next 2 chs. (3 sc)
- Rows 2 to 4: Ch 1, turn, sc in each of the 3 sts. (3 sc)
- Fasten off, leaving an 8 inch tail for sewing.
The stem is 4 rows of 3 sc, about 3/4 inch tall.
Tendril (green)
- Ch 12.
- Work 2 sc in the 2nd ch from the hook and in each of the next 10 chs. That’s 11 chs worked, so 22 sc.
- Fasten off, leaving a short tail for sewing.
The doubled stitches make the strip spiral on its own. If it needs help, wrap it around a pencil for a minute.
Sewing It On
Tuck the stem slightly behind the top of the pumpkin and sew it first. Then whip stitch around the pumpkin’s edge with the long tail, catching the top loops of Round 6 and one strand of the base fabric. Keep stitches relaxed so nothing puckers. On bags I switch to matching thread. For a child under three, skip the tendril and sew the stem down securely.
Make It Bigger or Smaller
Stop after Round 4 for a mini pumpkin (about 1.75 inches). For a large one (about 3.5 inches), add Round 7: (sc in the next 5 sts, inc) 6 times (42), and Round 8: (sc in the next 6 sts, inc) 6 times (48).
Common Mistakes
Three things trip people up. A loose magic ring leaves a hole, so pull it tight. Skipping the stitch marker makes you lose your place in the spiral. And loose ribs or a too big hook make the pumpkin look flat and floppy. I’ve made all three.
FAQ
Is this pattern really free?
Yes, the whole pattern is on this page.
What yarn is best?
Worsted weight. Acrylic suits hats; cotton suits coasters.
Can a beginner make it?
Yes. You only need a magic ring, single crochet, increases and slip stitches.
About the Author: Sara McLean is the creator of AppliquéFits.com and a textile designer who shares practical appliqué, sewing, and fabric-design ideas.