

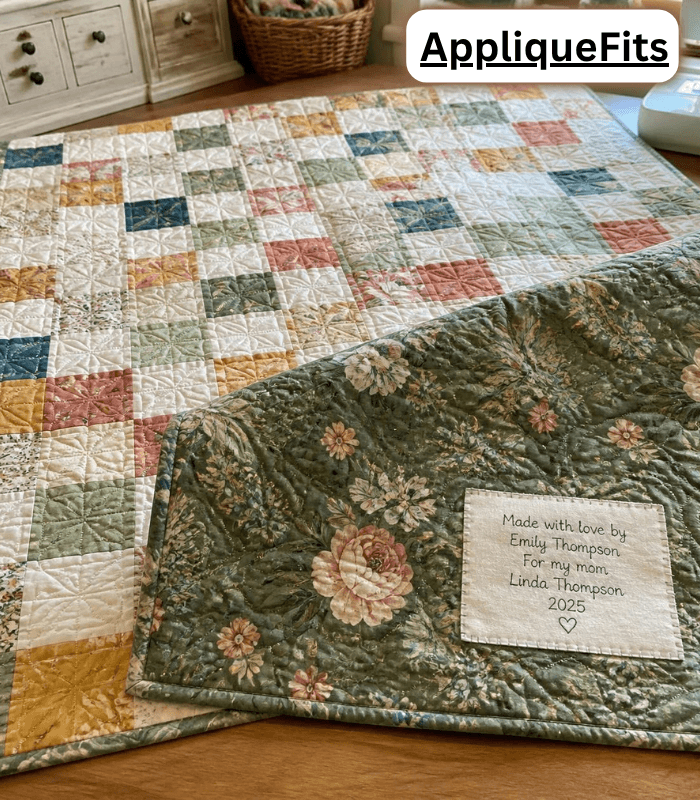
Okay, I’m gonna be honest with you. When I finished my very first quilt back in 2008, I was so excited and exhausted that I literally threw it in a box and gifted it without a single label. My mom loved the quilt, but ten years later, she asked me, “Wait, what year did you make this?” and I genuinely couldn’t remember. That’s when I realized: I’m never doing that again.
Now, I can’t finish a quilt without adding a label. It’s like signing your name on a painting—except this label is going to outlive us all, and someday, maybe your great-grandchild will hold that quilt and read YOUR name and YOUR date and think, “My great-great-grandmother made this.” That’s the magic, honestly.
Table of Contents
The Easiest Way: Just Sew On a Quilt Label by Hand
Here’s what I do almost every time because it takes like ten minutes and looks so beautiful.
I grab a scrap of white cotton (literally any nice fabric), I grab a scrap of white cotton, cut a rectangle 6 inches by 5 inches (that gives you a finished label around 5″ x 4″ once folded), and fold all the raw edges under ¼ inch. A light spritz of starch before pressing makes the fold crisper and way easier to stitch straight. Then I press it with my iron because wrinkled labels look cheap and I’m not about that.
Then I grab a pen. A permanent marker, specifically. I write something real: “Made by Sara McLean for MAYA in 2026.” Sometimes I add why. “Made because she was getting married.” “Made from fabric Grandma gave me.” Just something that matters.
Here’s the thing nobody tells you: a label should make you smile when you look back at it.
- Position the label in the bottom right corner of the quilt back.
- Pin it in place.
- Thread a needle with thread that matches the label fabric.
- Slip-stitch around all four sides, catching only the backing and batting — not the front of the quilt.
Takes me 15 minutes. Costs me nothing. Looks professional. Everyone wins.
No-Sew-Required Option: Bound-In Label
If you’d rather skip hand-stitching entirely, cut a 6½” square, fold it diagonally into a triangle, write your message, and tuck it into a bottom corner of the quilt back with the raw edges aligned to the quilt edge. When you sew your binding on, it catches and encloses both raw edges of the label automatically — no hand-sewing needed.
When I’m in a Hurry: Iron-On Labels (Yes, They Actually Work)
Look, I used to judge iron-on quilt labels. Then I made five quilts in two months for Christmas, and I realized sometimes you gotta do what works.
You can buy pre-made iron-on labels, or here’s what I do: I print on fabric sheets (they’re like $12 for a pack of 10 on Amazon), cut out the shape, and iron it on according to the directions. It’s honestly fine. Will it last forever like a hand-sewn label? Probably not. But does it get the job done and look cute? Absolutely.
The beauty is you can make quilt labels free this way too—just use your printer and printable fabric sheets. Design something simple in Canva (also free) and boom. Done.
Getting Fancy: Methods I’ve Tried and Actually Loved
Freezer paper labels changed my life one afternoon. Sounds fancy; it’s not. I literally trace my design on freezer paper, iron it to fabric, embroider around it, peel it off. The freezer paper holds everything in place so your stitches are perfect. This is how I make quilt labels that actually look intentional.
Embroidery machine labels are next-level if you have access to one. I borrowed my friend’s machine once and embroidered my initials and the year directly onto a fabric label. It looked like I spent hours on it (I didn’t), and honestly? Worth it for special quilts.
Cricut labels are what I do when I’m feeling creative. Cut fabric labels in wild shapes—hearts, stars, whatever—and then sew or embroider on them. I’ve made custom labels with names, dates, even tiny images. It’s probably overkill, but it’s fun, and that’s what quilting is about anyway.
The best part? All of these are basically free if you already own the equipment (or borrow it from someone). You’re just using what you’ve got.
Why This Actually Matters
Here’s what I learned: your quilt label isn’t extra. It’s the story. It’s proof that you sat at your machine or hand-stitched at 11 PM thinking about the person you were making it for. It’s documentation that you existed and you created something beautiful.
I have a quilt from my grandmother that she made in 1987. It says her name, my name, and the date on a little label sewn into the corner. I hold that quilt and I feel close to her. I know exactly when she made it, that she made it for me, and that she cared enough to sign it.
Be that person.
Whether you hand-sew it in fifteen minutes or get fancy with embroidery, whether you write it by hand or print it, whether it costs five cents or five dollars—just sew on a quilt label. Your future self and everyone who loves that quilt will thank you.
That label is how your quilts become heirlooms.
FAQ
What pen should I use on a fabric quilt label?
A pen made for fabric, like a Pigma Micron or Frixion pen — not a regular Sharpie, which can bleed or fade unevenly.
Can I add a label after the quilt is already finished?
Yes, hand-sewing works on a completed quilt. The bound-in method only works before you’ve sewn the binding on.
Does a quilt label have to be fabric?
No — ribbon or twill tape work too, but fabric blends in best with the quilt back.
By Sara McLean