

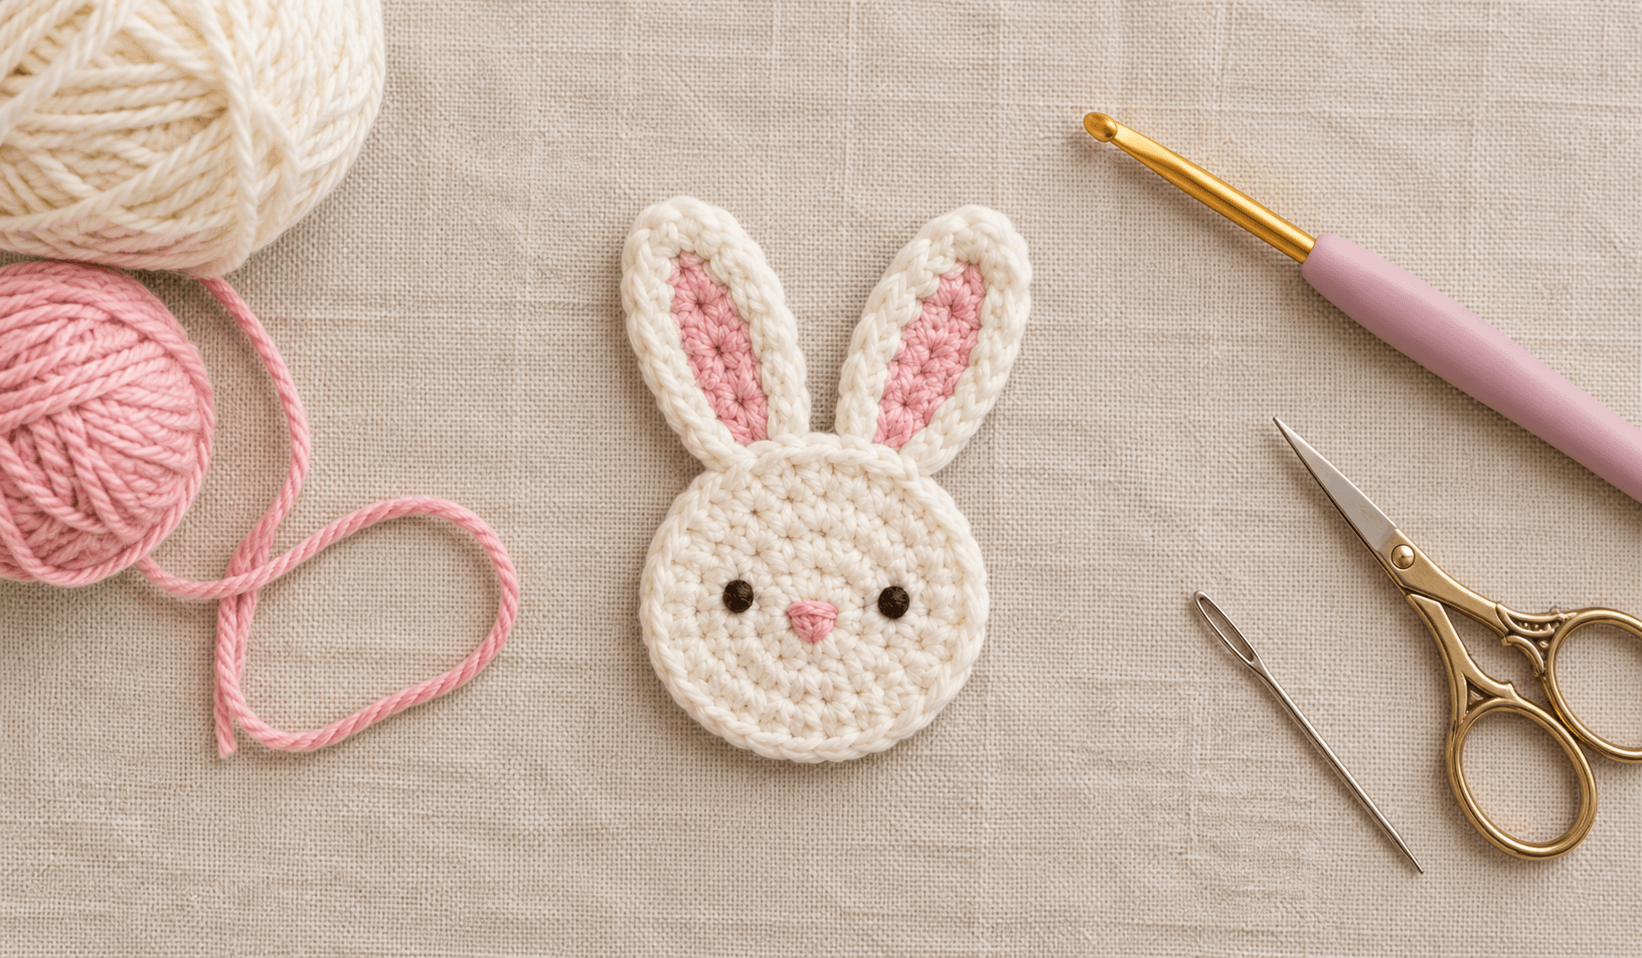
A crochet bunny appliqué is a small flat bunny face you make separately and sew onto bags, hats, or baby clothes. This free crochet bunny appliqué pattern uses a round head, long tapered ears, and a tiny pink inner ear. It takes about 25 minutes with scrap worsted yarn.
I wrote this pattern while teaching a friend to crochet. She picked the bunny because it looked easy. Then she got stuck on the magic ring and nearly quit. So I added a simple alternative start (it’s below), and she finished her bunny that same evening. Now she makes them for everyone.
Table of Contents
What You’ll Need
- Yarn: worsted weight scraps (Craft Yarn Council category 4). White, cream, or gray work well.
- Hook: 3.5 mm. A small hook keeps stitches tight and tidy.
- Yarn needle, scissors, and pins
- Pink yarn for the inner ears and nose
- Dark yarn for the eyes
Abbreviations: ch = chain, sl st = slip stitch, sc = single crochet, hdc = half double crochet, dc = double crochet, inc = 2 sc in the same stitch
Step 1: Crochet the Bunny Head
The finished head is about 1.75 inches (4.5 cm) wide.
- Make a magic ring. Ch 1, work 6 sc into it, pull tight, and join with a sl st. (6) Beginner shortcut: If the magic ring feels hard, ch 2 and work 6 sc into the 2nd chain from the hook. Join and continue.
- Ch 1, inc in every stitch. Join. (12)
- Ch 1, sc in the next stitch, inc in the next. Repeat 6 times. Join. (18)
- Fasten off, leaving a 6-inch tail.
Step 2: Make the Long Ears (Make 2)
Outer ear: Ch 7. Sl st in the 2nd chain from the hook, sc in the next chain, hdc in the next, then dc in each of the last 3 chains. (6) Fasten off with a long tail. The narrow end is the tip.
Inner ear (pink): Ch 5. Sl st in the 2nd chain from the hook, sc in the next chain, then hdc in each of the last 2 chains. (4) Fasten off.
Sew the pink piece onto the outer ear. Then sew the wide end of each ear behind the top of the head, slightly apart.
Step 3: Add the Face
- Eyes: two tiny straight stitches, about 3 stitches apart.
- Nose: a small pink triangle between and just below the eyes.
Tips From My Own Trial and Error
- Pin the ears and take a step back. A small change in angle changes the bunny’s whole mood.
- Sew the bunny on first, then stitch the face. The eyes stay straight on the finished piece.
- Use cotton for upright ears. Acrylic ears tend to flop.
- Whip stitch around the edge for hats and sweaters. Sew through the center for bags.
Mistakes I’d Skip
- Ears too wide. They look like a hood. Keep them narrow.
- Ears too low on the head. The bunny ends up looking sleepy.
- A loose starting ring. Pull that tail firmly, or a hole shows.
- Gluing onto clothes. Glue fails in the wash. Sew it.
- Not counting. Check for 6, 12, and 18 stitches at each round.
FAQs
Is this free crochet bunny appliqué pattern good for beginners?
Yes. It uses a magic ring (or the chain shortcut), single crochet, and a few taller stitches for the ears.
What yarn is best?
Worsted cotton for upright ears, acrylic for soft baby items. Match it to the item you’re decorating.
Can I wash items with a crochet bunny appliqué?
Yes, if it’s sewn on securely. Use a gentle cycle in a mesh bag and air dry.
How do I make an Easter bunny?
Use pastel yarn and add a tiny bow beside one ear.
Final Thoughts
If you want a free crochet bunny appliqué pattern that’s quick and forgiving, start here. Make one this week and sew it onto something plain.
About the Author: Sara McLean is the creator of AppliquéFits.com and a textile designer who shares practical appliqué, sewing, and fabric-design ideas.