

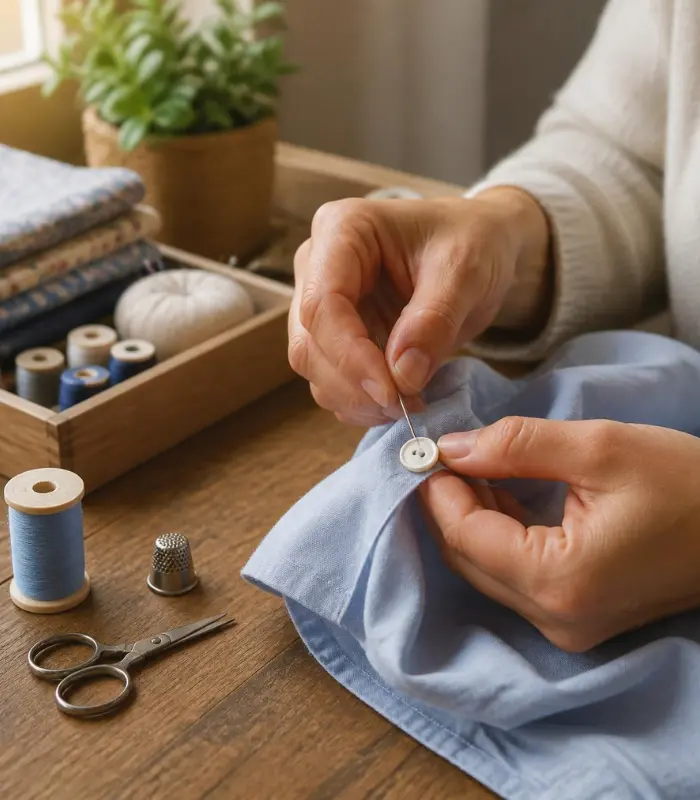
I’ll be honest—the first time a button popped off my favorite blazer, I panicked. I looked up tailors in my area, saw the price ($15-25 per button), and thought, “There has to be a better way.” That afternoon, I grabbed a needle, some thread, and YouTube. Three minutes later, my button was secure again.
That was five years ago, and since then, I’ve sewn buttons. It’s become my go-to skill for quick repairs—everything from my work shirts to my winter coat buttons to the occasional loose button on my jeans. What started as desperation turned into a practical life hack that’s saved me hundreds of dollars.
Table of Contents
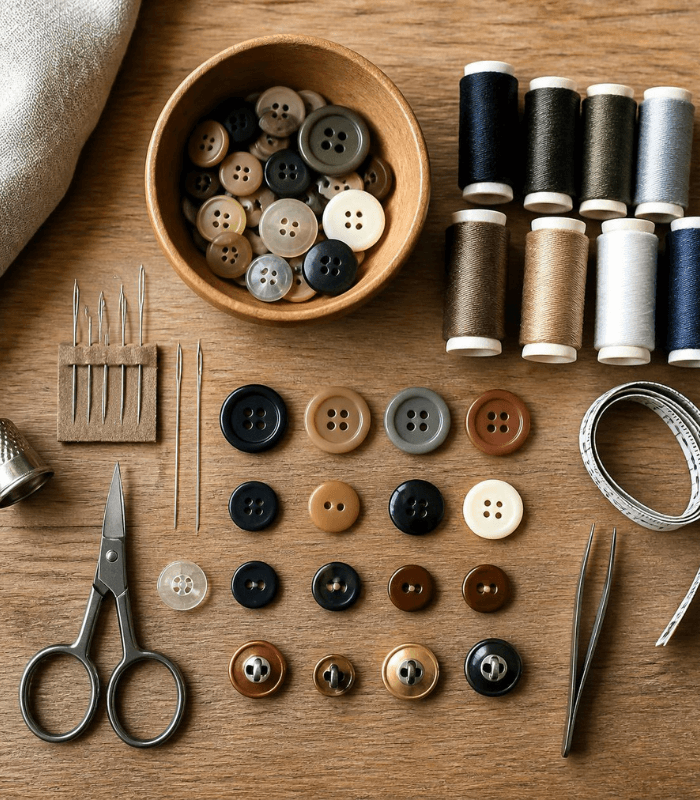
What You’ll Need: Tools and Materials for Button Sewing
Before we dive into the mechanics, let me walk you through what I keep in my sewing kit:
Essential Materials:
- Needle – A hand sewing needle, preferably size 7-10. I use a universal needle because it works on most fabrics
- Thread – Matching the color of your garment (or use clear thread if you’re in a pinch). I prefer thread that matches exactly for a professional finish
- Button – The replacement button (if needed) or the original that’s come loose
- Scissors – Small, sharp scissors for cutting thread
- Thimble – Optional but helpful to protect your finger when pushing the needle through tough fabrics like denim or coat material
Helpful Extras:
- Small magnifying glass (for detailed work, especially with tiny buttons)
- Tweezers (to hold buttons steady while sewing)
- Button fasteners or backing buttons (these prevent buttons from sinking into soft fabrics)
The beauty of hand sewing a button is that this entire setup costs less than $5 at any craft store, and you’ll use it repeatedly.
Visuals
Understanding Different Button Types: What You’re Working With
I’ve learned through experience that not all buttons are created equal. The technique changes slightly depending on what you’re working with.
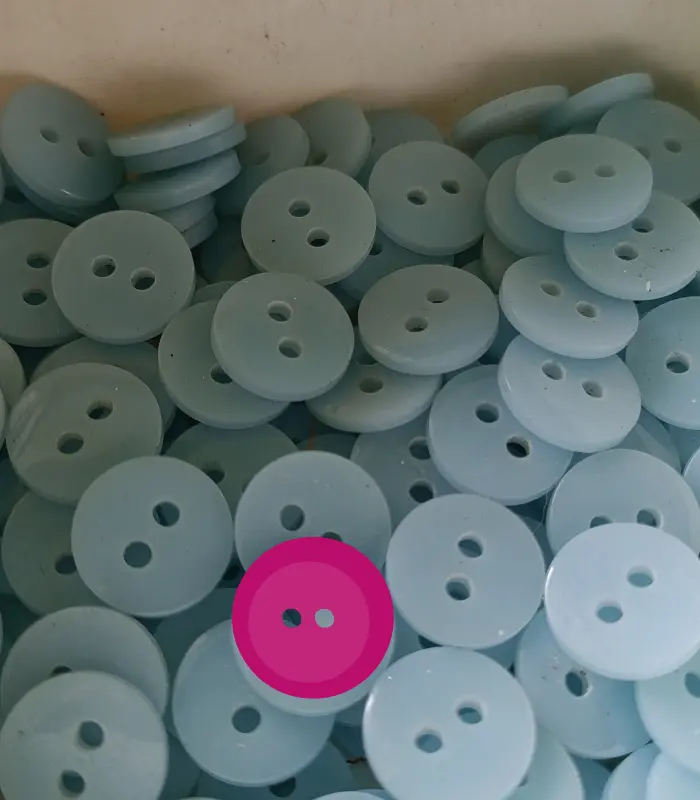
Two-Hole Buttons
The most common type. You’ll find these on most shirts, and they’re the easiest to master. The two holes allow for a simple up-and-down stitching pattern. When I’m hand sewing a shirt button, I can have it secure in about 2 minutes.
Four-Hole Buttons
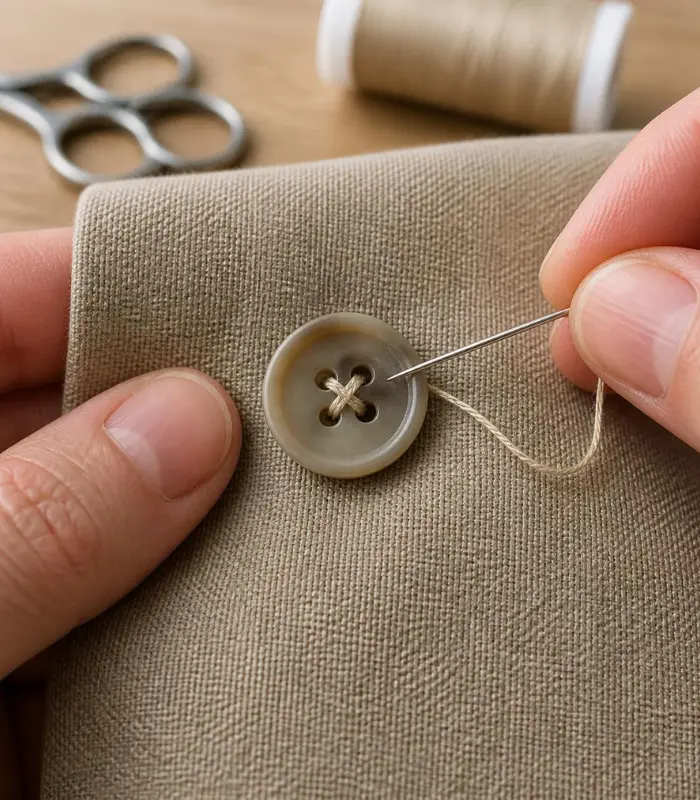
More common on formal wear and quality garments. These buttons distribute stress across four points, making them stronger. I typically sew them in an “X” or “+” pattern to maximize durability.
Shank Buttons
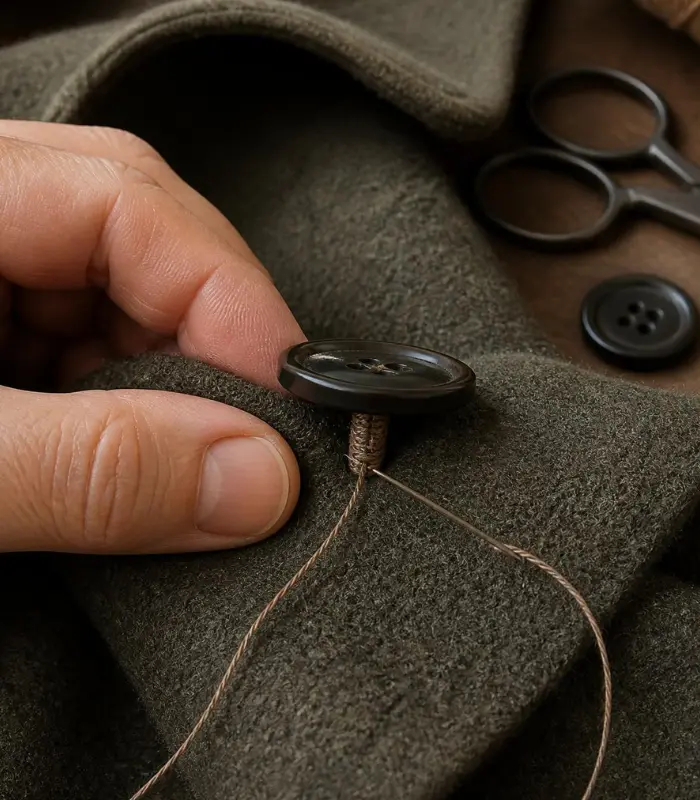
These have a raised stem (or shank) on the back instead of holes. I see these on blazers, formal coats, and decorative buttons. The shank creates space between the button and fabric, which is crucial for thick materials.
One-Hole Buttons
Rare but exist on vintage or specialty garments. These require a slightly different technique, which we’ll cover.
Buttons Without Holes (or With Specialized Fasteners)
Some fashion buttons have adhesive backs or snap attachments. These aren’t hand-sewn in the traditional sense, but I’ll mention alternatives.
How to Sew a Button by Hand: Step-by-Step Instructions
This is the core section where I’ll share the exact process I use every time.
Step 1: Prepare Your Thread and Needle
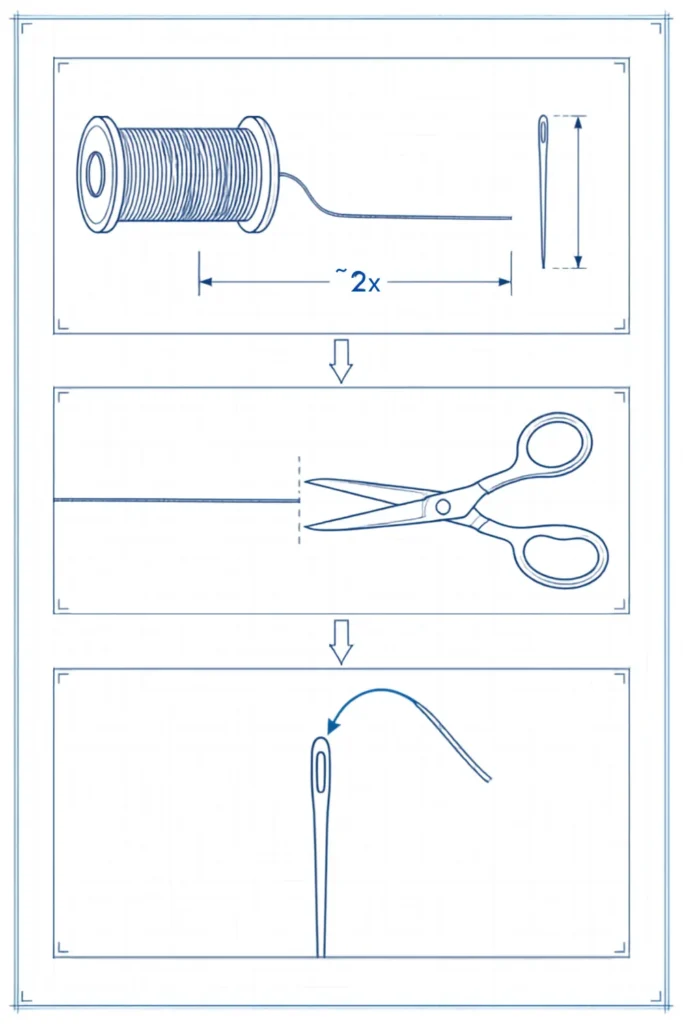
First, I cut about 18-24 inches of thread—long enough to sew securely without running out, but not so long that it tangles. If you’re working with delicate fabric, go shorter.
I double the thread and thread both ends through the needle, creating a loop. This doubles the thread strength. For particularly sturdy fabrics like jeans or coat material, I thread it once and work with a single thickness, which actually gives me better control.
Pro tip: If your thread keeps slipping out of the needle, wet the end slightly with your tongue. The moisture helps.
Step 2: Secure Your Starting Knot
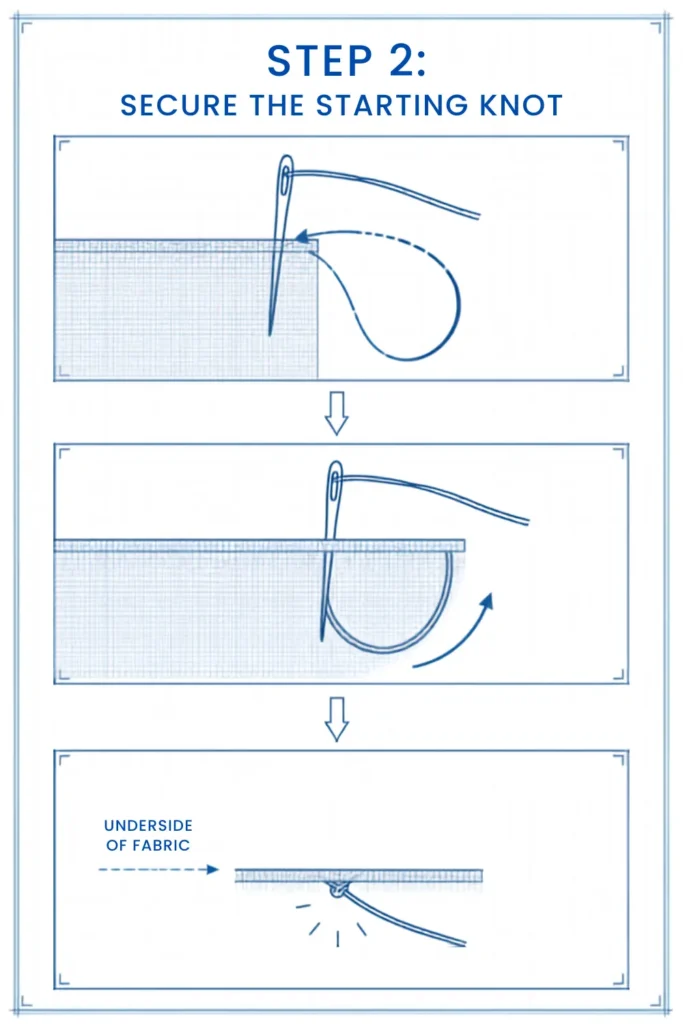
I always tie a small knot at the end of my thread. I loop the thread around my finger once, then roll that loop off while pulling the thread tight. The result is a small, neat knot that won’t pull through the fabric.
For additional security on garments that see heavy wear (like pants), I sometimes start with a knot on the underside and take two or three small stitches in one spot on the wrong side of the fabric before even bringing the needle up through a button hole.
Step 3: Position Your Button
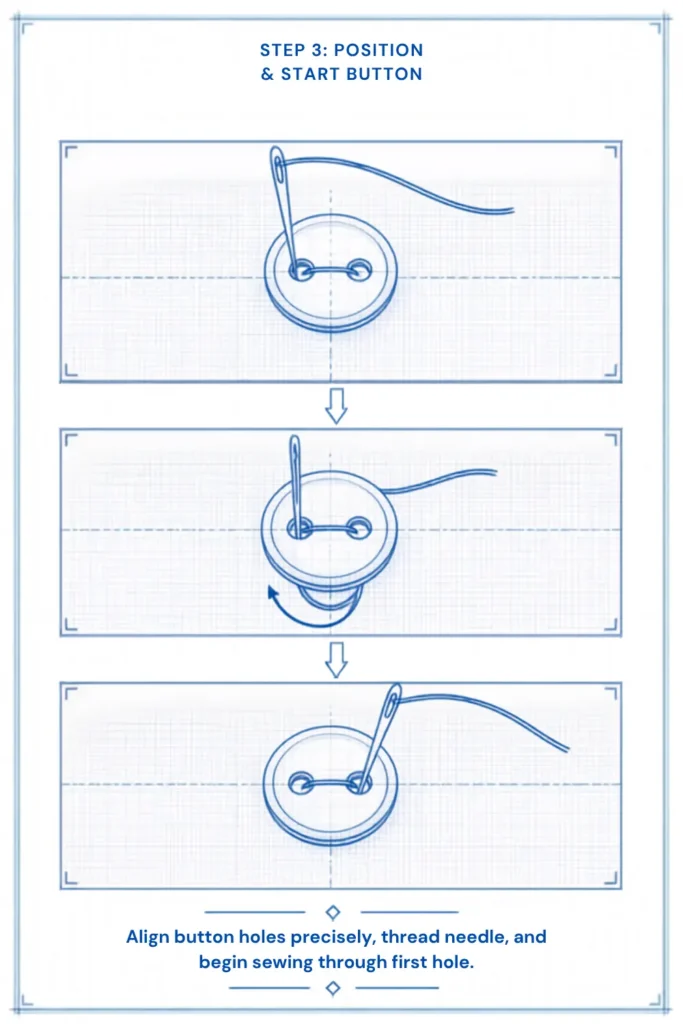
Now, this matters more than you’d think. I always:
- Place the button exactly where it needs to sit
- Use my thimble or a small backing button on the wrong side of the fabric (this prevents the button from pulling through soft fabric)
- If the original button tore the fabric, I might reinforce that spot with a small patch first
Step 4: Sewing a Two-Hole Button (The Basic Button Stitch)
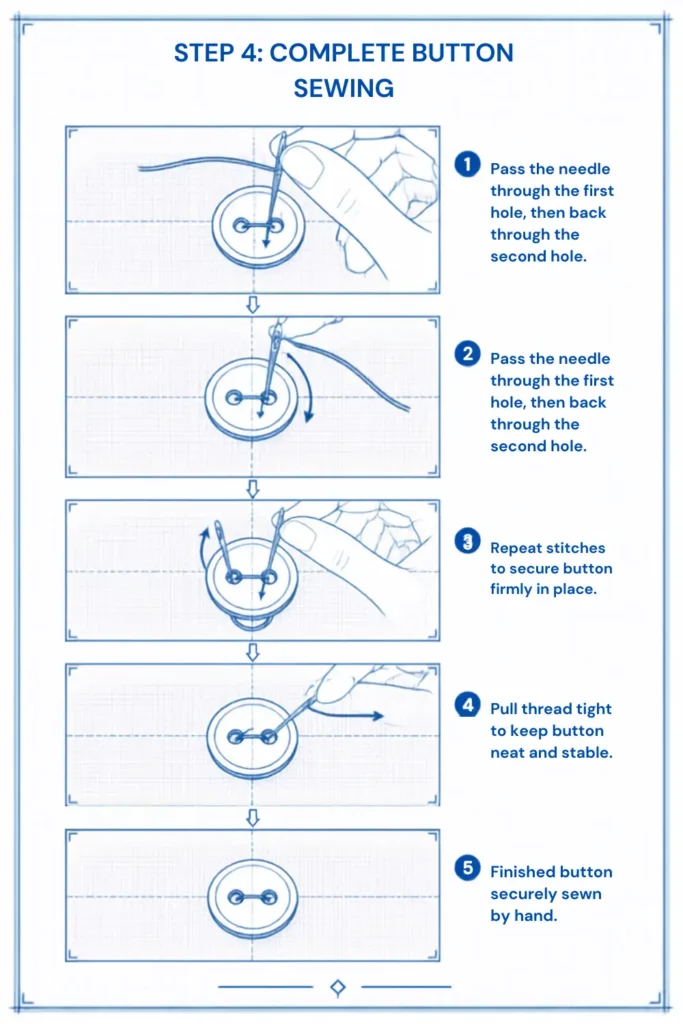
Here’s where the real button stitch happens:
- Bring the needle up through one hole of the button from the underside of the fabric
- Push down through the opposite hole
- Come back up through the first hole you used
- Repeat this up-and-down motion 6-8 times
I do this minimum of 6 passes because buttons take stress. Every time you button your shirt or jacket, that button experiences tension. Six passes ensures it won’t come loose for months.
For my formal shirts, I actually do 10-12 passes. Better safe than having a button fall off mid-meeting.
Step 5: Creating a Thread Shank (For Thicker Fabrics)
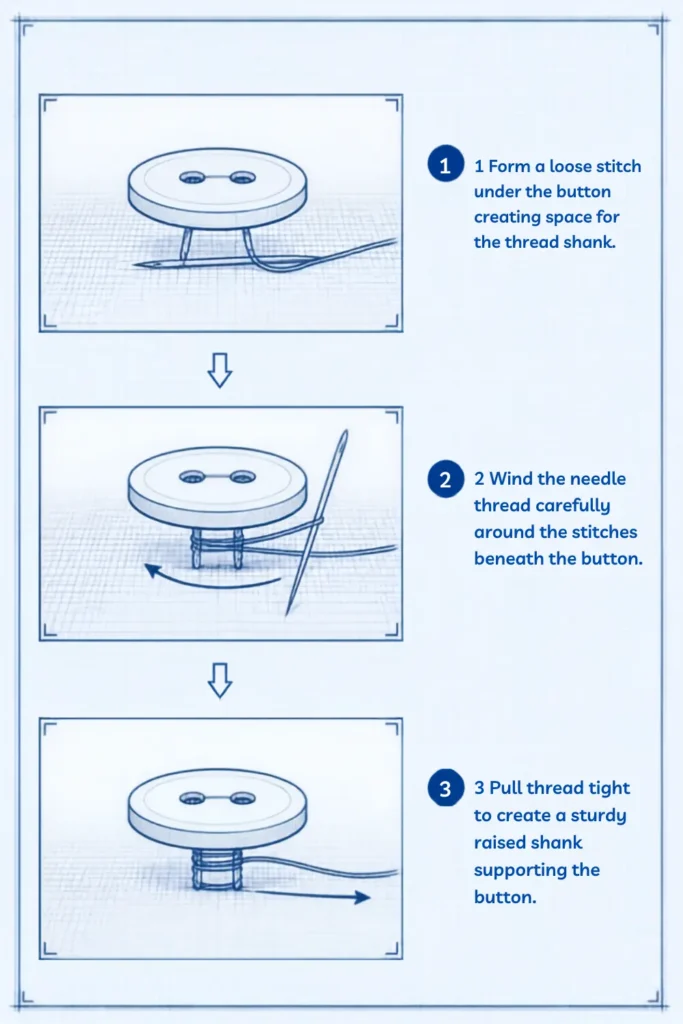
This technique is crucial when I’m sewing a button on a jacket, coat, or any thick material. Here’s why: if you sew the button flush against the fabric, it will be hard to button, and the thread can break under pressure.
After my stitching passes, I:
- Position the needle between the button and fabric
- Wrap the thread around this space (under the button) 3-4 times, creating a small stem
- Push the needle back through the wrapped thread to secure it
- Pull tight so the button sits slightly raised
This thread shank prevents stress on the actual stitch and distributes wear more evenly. I use this technique on every button I sew on pants, coats, and denim.
Step 6: Finishing Off
Once I’m satisfied with the stitch (and I always give the button a firm tug to test), I:
- Bring the needle to the wrong side of the fabric
- Make 2-3 small stitches in one spot on the underside (not through any button holes)
- Wrap the thread around these stitches once
- Pull the needle through that loop to create a knot
- Trim the excess thread
I never cut the thread flush. I always leave a tiny tail—if the knot somehow comes loose, that tail acts as a safety net.
How to Sew Different Buttons: Technique Variations
How to Sew a Four-Hole Button
The process is similar, but the pattern matters:
The “X” Pattern (my preference): Stitch diagonally from top-left to bottom-right, then bottom-left to top-right. This distributes stress evenly and looks professional.
The “+” Pattern: Stitch straight down one pair of holes, then straight down the other pair. This also works well but requires more passes to feel secure.
I typically do 4-5 passes in each direction, so 8-10 total stitches, which distributes the load and prevents any single hole from enlarging over time.
How to Sew a Shank Button
Shank buttons are actually easier because there’s no hole in the fabric—the shank sits on top:
- Bring your needle up through the shank loop
- Push down right next to it (through the fabric, not the shank again)
- Come back up through the shank loop
- Repeat 6-8 times until the button is secure
The key is going around the shank stem, not through button holes. This anchors the button more securely.
How to Sew a One-Hole Button
These are unusual, but I’ve encountered them on vintage blazers:
- Thread the needle through the single hole multiple times (8-10 passes minimum)
- Expect resistance—single-hole buttons are engineered for durability, so the hole is small and tight
- Use the thread shank technique for sure, since these are typically on structured garments
Sewing Buttons on Different Garments: Garment-Specific Tips
How to Sew a Shirt Button
Shirt buttons are usually standard two-hole buttons on light to medium fabric. My approach:
- 6-8 stitching passes minimum
- No thread shank needed (shirts fold easily, so a flush button works)
- Use matching thread so repairs are invisible
- Check inside the shirt for any lining that might need separate attention
How to Sew a Button on Pants or Jeans
This is where durability matters most. Pants buttons experience constant stress from sitting and movement.
My technique:
- Double or triple my thread for extra strength
- Do 10-12 stitching passes (not 6-8)
- Always create a thread shank, even though the original might not have had one
- Use a backing button on the inside of the waistband to distribute pressure
- For jeans specifically, I match the denim thread weight—these buttons work hard
How to Sew a Button on a Jacket
Jacket buttons are usually larger and see consistent use. They’re also typically on thicker material.
My approach:
- Create a pronounced thread shank (this is non-negotiable for jackets)
- Do 8-10 passes minimum
- Test the button firmly before finishing—jackets can’t afford button failures
- Consider matching thread color carefully; jacket buttons are visible
How to Sew a Button on a Coat or Blazer
Formal wear demands professional results. Winter coat buttons and blazer buttons need to be absolutely secure.
- Use the thread shank technique every time
- 10-12 stitching passes
- If the coat has a facing or lining, sew through just the top layer initially, then reinforce through all layers
- Finish with extra knots on the underside—these buttons are too important to fail
Common Mistakes I Made (So You Don’t Have To)
After five years of sewing buttons, I’ve discovered what doesn’t work:
Mistake 1: Not Enough Stitching Passes
I used to do just 3-4 passes thinking that was enough. Buttons popped off within weeks. Six passes is genuinely the minimum.
Mistake 2: Forgetting the Thread Shank on Heavy Fabrics
I once sewed a button flush on a winter coat. The thread snapped within three wears because the button was too tight against the thick material. Now I always create that small stem on anything thicker than cotton.
Mistake 3: Using Thread That’s Too Short
Running out of thread mid-repair is frustrating. I learned to cut 18-24 inches every time. Better too much than too little.
Mistake 4: Not Securing the Starting Knot Properly
I’ve had stitches pull out completely because I rushed the starting knot. Now I always double-check that initial anchor point.
Mistake 5: Skipping the Button Test
I’d finish sewing, cut the thread, and only later discover the button was loose. Now I always give every button a firm tug before finishing.
Mistake 6: Matching Thread Color Poorly
Using white thread on a navy shirt looks amateur. Invest 30 seconds in finding thread that matches your garment.
When to Use a Sewing Machine Instead
I hand-sew most buttons, but I sometimes use my sewing machine. Here’s when:
When to use a sewing machine:
- Bulk repairs – If you’re replacing multiple buttons at once
- Shank buttons – A machine can actually create more secure shank fastening
- Professional finish – If you want perfectly uniform stitches
- Thick material – A machine handles denim and heavy coat fabric with less effort
When to stick with hand sewing:
- Delicate fabrics – Silk, satin, or thin materials are safer with hand control
- Placement precision – Hand sewing gives you exact control
- Quick fixes – Hand sewing is faster for a single button
- When a sewing machine isn’t available – Which is often my situation
The truth is, hand sewing a button is actually faster for single repairs. I can have a shirt button secure in 5 minutes using hand sewing.
Tips for Professional-Looking Button Repairs
After all these years, I’ve picked up some tricks:
Tip 1: Use a Backing Button
Place a small button on the underside of the fabric before sewing. This prevents the thread from pulling through soft material. It’s especially important on shirts and lightweight fabrics.
Tip 2: Keep Your Stitches Tight
Slack stitches fail faster. Every pass should be snug, but not so tight that you’re breaking thread. It’s a balance.
Tip 3: Match Your Thread Perfectly
Take the original button to the fabric store and hold thread up to it in natural light. What looks right under store lighting might not match your shirt.
Tip 4: Invest in Quality Thread
Cheap thread breaks easily. I spend a little more on thread because it lasts longer and looks better.
Tip 5: Practice on a Scrap First
If you’re nervous about your fancy jacket, practice on an old shirt. The technique is identical, but the stakes are lower.
Tip 6: Finish With Intention
Those final stitches on the underside matter. A neat, secure finish means your repair will last months instead of weeks.
FAQ
How many times should I sew a button?
My answer: Minimum 6 passes for light wear (like a nice shirt you wear occasionally), 10-12 passes for items that see regular use (pants, everyday jackets). I count each pass as one up-and-down motion through both button holes (or around the shank).
What’s the best way to sew a button for a beginner?
Start here: Use a two-hole button on an old garment you don’t care about. Cut 18-24 inches of thread, tie a knot, position the button, and do 8 simple up-and-down stitches. That’s it. No thread shank, no complexity. Get comfortable with the basic motion first.
Can I sew a button with a sewing machine?
Yes, but: Machine sewing works well for shank buttons and bulk repairs, but it’s overkill for a single button. Hand sewing is faster and more precise for individual repairs. If you do use a machine, use a button sewing foot and set it to a zigzag stitch, stopping periodically to check that stitches aren’t too tight.
How long does a hand-sewn button last?
In my experience: 3-6 months for regular wear with 6-8 stitching passes. If you do 10-12 passes and use a thread shank on stress-bearing garments (pants, jackets), I’ve had buttons last a year or more without failure.
What should I do if the buttonhole is damaged?
First steps: If the fabric around the hole is torn, reinforce it with a small patch of interfacing or a scrap of matching fabric on the underside before sewing the button. If the buttonhole itself is enlarged, consider moving the button slightly up or down. If the button keeps pulling through, use a backing button on the underside every time.
Is there a difference between sewing a button and hand sewing in general?
Not really: Button sewing is the foundation skill for all hand sewing. Once you master this, you can move on to basic mending, stitching seams, and other repairs. It’s the gateway skill.
By Sara McLean