

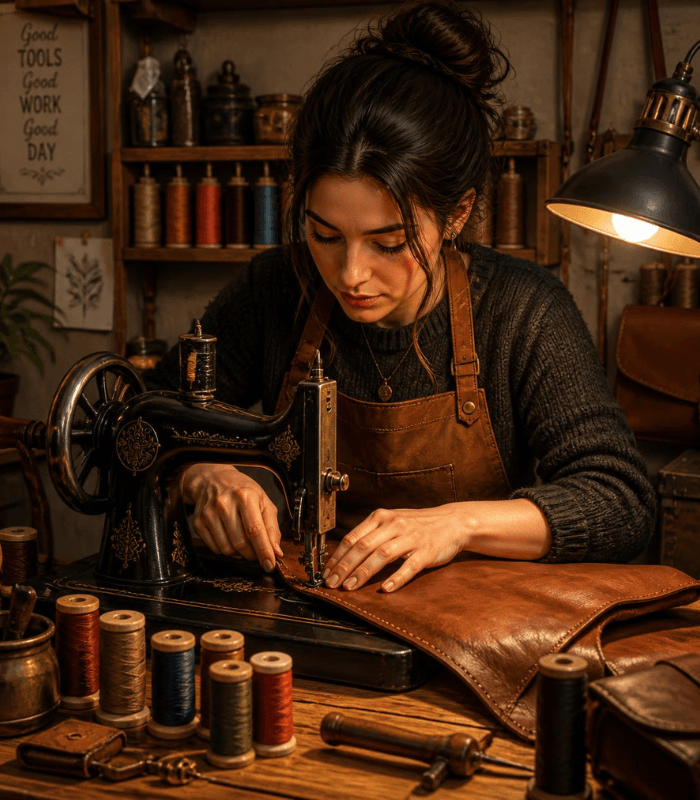
Let me be completely honest—I bought that vintage Singer manual “sewing machine” at a garage sale for $25 thinking I’d picked up a treasure. I had zero leather experience. My first project? I grabbed my husband’s favorite leather jacket that needed repair. I threaded the needle with regular cotton thread (don’t ask why I thought that would work), shoved the leather under the presser foot like it was fabric, and started pedaling like my life depended on it.
The needle broke instantly. Then I tried again with the second needle. Broke that one too. By the third needle, I actually cried. I was so frustrated. My husband walked in, saw the carnage, and just shook his head silently. That moment? That’s exactly where my real education began.
That was five years ago. Since that disaster, I’ve hand-stitched over 30 leather pieces on that same manual machine—wallets I gift to friends, leather journals I actually use, a saddle bag I carry everywhere, and even a custom leather belt for my daughter’s graduation. Every single one turned out beautifully, and I want to share exactly what I learned so you don’t waste needles and money like I did.
Table of Contents
Why I Fell in Love With My Manual Machine for Leather
Here’s the thing nobody tells you: I didn’t choose a manual machine because I’m some romantic craftsperson. I chose it because I couldn’t afford an expensive industrial machine. But working with that manual machine? It changed everything for me.
When I’m pedaling slowly, my hands actually control the leather. I can feel it. I’m not fighting against a powerful motor yanking the material through. Last month, when I was working on a thick leather messenger bag, that manual control literally saved me. I hit a double-thick seam and could actually slow down, take my time, and push through without snapping another needle. I felt like a wizard.
I’ve watched my sister destroy two expensive electronic machines with leather. They jammed. They overheated. She gave up. Me? I’m still going strong with my $25 yard sale find.
What I Actually Bought (The Real Tools That Changed My Game)
After that initial disaster, I spent an embarrassing amount of time on YouTube and craft forums figuring out what I actually needed. Here’s what I purchased—and honestly, these tools transformed everything for me:
The needle situation: I bought a pack of heavy-duty leather needles (16/100 size) from a local fabric store. The shopkeeper actually held my hand through choosing the right size. Those needles cost like $8 for a pack of five, and they’re completely different from regular needles. Thicker. Sharper. Tougher. When I used my first one, I immediately felt the difference. No more snapping.
Thread revelation: I grabbed expensive Gutermann polyester thread because a leather worker on Instagram swore by it. It felt different in my hands—smoother, stronger. When I tried a seam with it, I actually gasped. The stitch looked professional. Before that, I’d been using whatever thread was in my drawer. No wonder my stitches looked terrible.
The walking foot gamble: I was hesitant to spend $40 on a walking foot attachment. I thought I was being extravagant. But my hands were getting tired manually pulling leather through, and my seams were crooked. I bought it anyway. That walking foot? It literally changed my entire experience. It pulled the leather evenly with the needle—I didn’t have to force anything anymore. Within one week of using it, my seams became absolutely straight and professional-looking. Worth every penny.
Small things that mattered: I grabbed some beeswax at a hardware store (I waxed my thread with it and it glided like butter), bought leather clamps instead of relying on presser feet, and got a thimble because my middle finger was getting sore and bruised from guiding the leather.
That mulch pad under the leather? I discovered that by accident when a scrap piece stuck under the needle. I realized it prevents something called needle deflection. Now I use it every time.
How I Actually Do It (Real Process, Real Steps)
Step 1: I always start by cleaning the leather Before I even look at my machine, I grab a soft cloth and wipe down my leather piece. I learned this the hard way when I started sewing and the needle kept catching on dust particles. It drove me absolutely nuts. Now I spend two minutes wiping, and everything runs smoothly.
Step 2: I prep my machine like a ritual This is where I got serious. I remove the standard needle and install my heavy-duty leather needle. Then I adjust my tension—I’ve learned that leather likes it tighter than fabric, so I dial it up to about 6 or 7 on my machine’s dial. I install my walking foot. I thread my polyester thread and run it through beeswax. This whole process takes maybe 10 minutes, but I’ve never regretted it.
Step 3: Here’s my secret to not breaking needles anymore I hand-turn the wheel to start every single seam. Every one. This was the game-changer. By manually turning the wheel, the needle goes into the leather at the perfect angle. Only after I’ve done that 2-3 times do I start pedaling. Once I began doing this, I literally stopped breaking needles. It sounds simple, but it’s everything.
Step 4: My actual pedaling rhythm I’ve learned to go slow and steady—about two pedal beats per second. I can actually feel when the needle is pushing through tough spots. If I feel resistance, I stop, hand-turn the wheel once, then continue. My friends think I’m slow, but my seams look professional while theirs look… well, rough.
Step 5: The mulch pad trick that saved me I place a mulch pad (or even carrier paper in a pinch) under the leather before I start. I discovered this when a piece of scrap accidentally ended up under the needle and suddenly everything worked better. That little pad prevents needle deflection—keeps your stitches from getting pulled at weird angles.
Step 6: After I’m done I always seal my leather edges with edge paint. Last month I forgot on a wallet I made, and the cut edges started fraying. Never again. Takes 30 seconds and completely changes how the finished piece looks.
What I Learned the Hard Way (My Personal Mistakes and Fixes)
I used to just grab any leather and start sewing. Not anymore. I learned this when I bought some thin, delicate leather for a wallet and it bunched up like crazy on my first seam. I pulled it out, completely frustrated. Now I always test on scraps first. Thin leather? Suede? Thick vegetable-tanned leather? They all act differently. I spend 10 minutes testing now and save myself hours of frustration.
I ignored beeswax for way too long. My thread would tangle. It would fray. I’d get frustrated and want to quit. Then someone on a sewing forum mentioned conditioning my thread with beeswax. I tried it and felt like a completely different sewer. The thread practically glides through the leather now. It’s not optional for me anymore—it’s the first thing I do.
I used to think I could push through with dull needles. Wrong. Dead wrong. I’d be sewing away, and my stitches would start looking weird—pulled, puckered, ugly. I’d get so mad at myself thinking I was doing something wrong. Then I’d change the needle and suddenly everything looked perfect again. Now I change needles every 3-4 hours religiously. Honestly, after 30 leather projects, I’ve become a little obsessive about needle freshness.
Speed was my enemy for the first year. I used to pedal fast, thinking I’d get more done. My seams looked terrible. My hands would hurt. I’d break needles. One day I just decided to slow down completely—almost meditating pace. Everything changed. Better seams. Fewer mistakes. Less frustration. No more rushing for me.
As the legendary leatherworker Horween once said, “Quality leather deserves patience. Rush the process, and you’ll feel regret in every stitch.” I have that quote written on a card next to my sewing machine. Seriously. Every time I sit down, I see it. It reminds me why I slow down.
The Specific Mistakes That Actually Happened to Me
Mistake #1: I used regular thread That first wallet I tried? Complete disaster. Cotton thread kept snapping, and my seams looked like a kindergartener did them. I felt so defeated. When I finally switched to polyester thread, I cried happy tears. Same machine, same needle, completely different result. Cotton and leather just don’t work together.
Mistake #2: I thought the walking foot was optional Without it, I was manually trying to pull the leather through evenly while also pedaling. My seams were crooked, wonky, and honestly embarrassing. One seam would be straight, the next would veer left. My father-in-law saw a bag I made and said, “Nice bag, but why is the seam doing that?” Ouch. That comment got me to buy the walking foot. Problem solved immediately.
Mistake #3: I pushed instead of let the machine pull I used to manually push the leather under the needle, thinking I was helping. All that did was make the needle deflect and break. Or worse, it would leave holes in my beautiful leather. I finally learned to just guide gently—let the machine and walking foot do their job.
Mistake #4: I kept using dull needles This was maybe my worst habit. I’d use the same needle for weeks, wondering why my stitches looked terrible. Then one day I just changed it randomly, and suddenly everything looked magazine-quality. Now I change needles after every 3-4 hour sewing session, and my work quality is night and day different.
Questions People Ask Me All the Time
What stitch length do I need?
I use 2.5–3mm. It gives clean, strong seams without making too many holes.
Presser foot or leather clips?
I prefer leather clips. They hold the layers without marking the leather and make the seam easier to see.
When should I change my needle?
I change mine every 3–4 hours. If the leather feels harder to sew or stitches start looking uneven, it’s time for a new needle.
By Sara McLean