

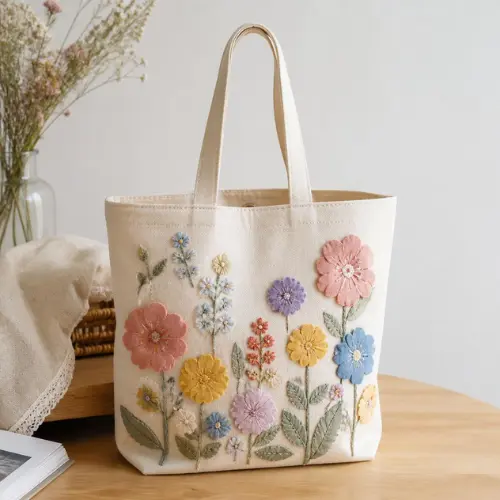
A tote bag design is really just the combination of fabric choice, structure, and whatever appliqué or embellishment you put on the front — a house, a butterfly, a heart, anything you like. It’s one of the most practical projects I make, because unlike a pillow or a quilt, it gets used almost every single day.
Table of Contents
Why I Keep Coming Back to This Project
I’ve made more tote bags than I can count at this point, and I still think they’re one of the best beginner to intermediate projects out there. You get to practice real bag construction — interfacing, straps, lining — while also having a blank front panel just waiting for whatever appliqué design you’re in the mood for that week.
What You’ll Need
- Sturdy outer fabric, like canvas or duck cloth
- Lining fabric (a cotton works fine)
- Interfacing, for structure
- Fabric for straps, or purchased webbing
- An appliqué shape of your choice — house, butterfly, heart, or your own design
- Fusible web
- A sewing machine
How I Build Mine
- Cut two outer panels and two lining panels, usually around 15″ x 16″, though you can size this up or down.
- Apply interfacing to the wrong side of the outer panels so the bag holds its shape.
- Add your appliqué to the front panel before you assemble anything. Trace your shape onto fusible web, fuse it to scrap fabric, cut it out, then fuse and stitch it onto the panel.
- Sew the outer panels together, right sides facing, along the sides and bottom.
- Sew the lining the same way, but leave a small gap for turning later.
- Attach your straps to the outer bag, sandwiched between the layers if you’re using fabric webbing.
- Slide the outer bag inside the lining, right sides together, and stitch around the top opening.
- Turn everything right-side out through the gap in the lining, then topstitch around the top edge to finish it off.
Tips From My Own Sewing Table
- I always place my appliqué in the lower third of the bag front — any higher and it gets lost under the straps once the bag is carried.
- If the bag’s going to carry groceries or books, don’t skimp on interfacing. A heavier weight makes a real difference.
- Boxing the corners gives you a flat-bottomed tote that actually stands up on its own, which I think makes it look far more finished.
- Save your sturdier canvas for the outside and let quilting cotton do the work on the lining and appliqué.
Mistakes I’ve Made (and Fixed)
- I skipped interfacing on an early bag and it turned out completely shapeless — more of a sack than a tote. Lesson learned.
- Placing an appliqué too close to the top edge means it disappears under the handles the moment you pick the bag up.
- Thin, flimsy straps might look fine on the table, but they’ll let you down fast on a bag meant to carry any real weight.
Questions I Get Asked
What fabric is best for a tote bag design?
Canvas or duck cloth for the outside — it holds its shape and wears well. Quilting cotton works nicely for the lining.
Can I put any appliqué shape on a tote bag?
Yes, genuinely any shape. House, butterfly, heart — the method is the same each time: fuse it, then stitch it down.
Do I actually need interfacing?
If the bag’s going to hold any weight at all, yes. Without it, the fabric sags and loses shape surprisingly fast.
How long should the straps be?
I usually cut mine around 24 to 26 inches for a comfortable shoulder carry. Shorter, around 18 inches, works better if you prefer to hand-carry the bag.
Can I skip the lining?
You can, though I wouldn’t recommend it. A lining hides your seam allowances, adds durability, and just makes the whole bag feel more finished, especially with an appliqué on the front.
Before You Go
A tote bag design is where practical sewing meets a little creative freedom. Once you’ve got the basic bag structure down, you can swap in a completely different appliqué every time and end up with a bag that genuinely feels like your own.
By Sara McLean