

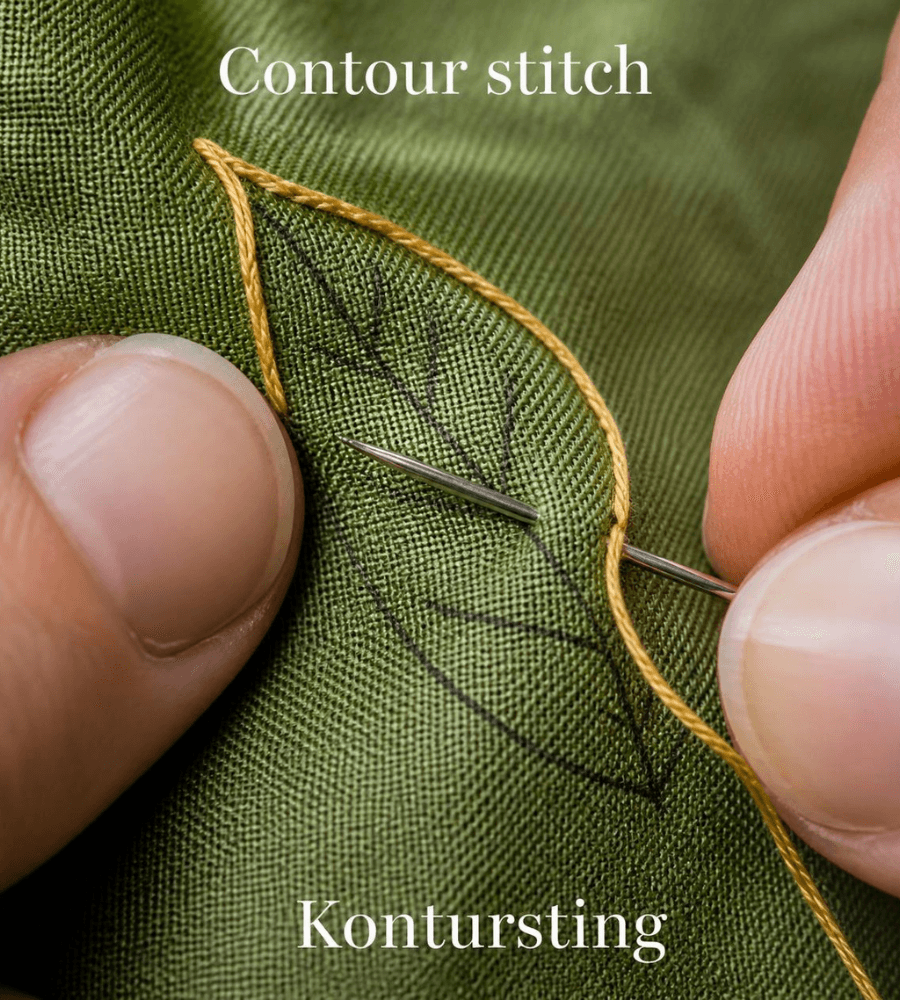
The contour embroidery stitch is a technique where stitches follow the outline or shape of a design, layer by layer, to create a smooth, raised, dimensional effect. It’s a stitch I come back to constantly in appliqué work and thread shading, because it’s the difference between a motif that looks flat and one that looks like it actually curves.
If you’ve ever looked at a stitched leaf or petal and wondered how it got that soft, rounded look instead of lying stiff and flat, this is usually the technique behind it.
Table of Contents
What Is Contour Embroidery Stitch?
Contour stitching means filling a shape by working rows that follow its edge, then moving inward, row after row, until the whole area is covered. Instead of stitching straight across a shape, you’re tracing its contour — that’s where the name comes from.
I use this stitch most often for:
- Appliqué fabric shapes, to blend the edges into the base fabric
- Thread-painted florals and leaves
- Realistic shading on animals, feathers, and fabric folds
The reason I reach for it over a plain fill stitch is texture. Because each row hugs the shape, the finished piece has a natural curve and depth that a flat satin stitch just doesn’t give you, no matter how neatly you stitch it.
Tools and Materials You’ll Need
- Embroidery hoop (4–6 inch is easiest to manage as a beginner)
- Embroidery needle (a size 7–9 crewel needle works well)
- Stranded cotton floss or perle cotton
- Fabric — cotton or linen is the most forgiving to start on
- Fabric marker or water-soluble pen to trace the shape
- Small embroidery scissors
How to Do Contour Embroidery Stitch: Step by Step
- Trace your shape. Draw the outline of the leaf, petal, or motif directly onto the fabric.
- Secure your fabric. Stretch it in a hoop so it stays taut while you stitch — a loose fabric is the number one reason contour rows end up uneven.
- Start at the outer edge. Bring your needle up just inside the traced line.
- Stitch along the contour. Follow the curve of the shape with small, close stitches, keeping the line unbroken.
- Work inward row by row. Once the outer line is done, start a new row just inside the first, following the same curve.
- Repeat until filled. Continue working inward until the entire shape is covered.
- Vary thread shade if shading. For a painted look, switch to slightly lighter or darker floss as you move toward the center.
A tip from experience: keep your tension even from the very first row. It’s tempting to go back and “fix” tension halfway through a shape, but that almost always makes the mismatch more obvious, not less. Stitches that are too tight will pucker the fabric; stitches that are too loose leave gaps in the contour lines.
Stem Stitch: The Foundation Every Beginner Should Learn First
Before attempting contour work, it genuinely helps to be comfortable with the stem stitch, since it’s often used to outline the shape you’ll later fill.
To work a stem stitch:
- Bring the needle up at the start of your line.
- Insert it a short distance ahead, along the line.
- Bring it back up halfway between the two points, keeping the thread below the needle.
- Pull through and repeat, always keeping the thread on the same side.
The result is a neat, slightly twisted rope-like line, ideal for stems, outlines, and curved borders. I almost always work a row of stem stitch as the first, outermost row of a contour-filled shape — it gives a clean, defined edge before the inner rows go in, and it hides any small unevenness in your original tracing.
What Is the Forbidden Stitch?
The forbidden stitch, also called the Peking knot or Chinese knot stitch, is a historic embroidery technique made of tiny, tightly packed knots used to fill entire designs with texture. It looks similar to a French knot but is worked in dense rows to cover large areas, often on silk.
The name comes from a popular but unverified legend: the stitch was said to be so fine and labor-intensive that it strained embroiderers’ eyesight, leading to it being “forbidden” in parts of Chinese court embroidery. I’ll be upfront that this story is repeated often but isn’t fully documented as historical fact — treat it as folklore that explains the name, not a verified record. Either way, the term has stuck, and today it describes any densely knotted fill stitch that demands real patience.
If you try it, work in short sessions under good lighting. It is genuinely eye-tiring over long stretches, which is probably part of why the legend feels so believable.
French Knot Embroidery Stitch: A Related Texture Technique
The French knot embroidery stitch is a small raised dot formed by wrapping thread around the needle before pushing it back through the fabric. It’s one of the most recognizable stitches in embroidery, used constantly for flower centers, eyes, and scattered texture.
Basic steps:
- Bring the needle up through the fabric.
- Wrap the thread around the needle two or three times.
- Hold the thread taut with your non-stitching hand.
- Insert the needle back close to (not exactly in) the starting point.
- Pull the wraps down snugly against the fabric as you pull the needle through.
The most common beginner mistake here isn’t the wrapping — it’s letting go of the thread tension too early, which turns a neat knot into a loose loop. Keep light tension right up until the needle is through the fabric.
French knots pair naturally with contour-stitched shapes. One combination I use often: a contour-filled leaf with a small cluster of French knots nearby as a flower center or a scatter of berries.
Common Mistakes Beginners Make
- Stitching too loosely, which leaves gaps between contour rows
- Ignoring the shape’s natural curve and stitching straight lines instead
- Using thread that’s too thick, which makes rows bulky and uneven
- Rushing knot stitches (French knots and the forbidden stitch), causing loose or lopsided knots
- Skipping the outline row, which makes the finished shape look messy at the edges
Tips for Better Contour Stitching
- Always outline first with a stem stitch or backstitch before filling.
- Work in good lighting — contour and knot stitches are detail-heavy and eye strain shows up fast.
- Practice on a fabric scrap before starting a real project. It’s not wasted time; it’s how you find your tension.
- Use an embroidery hoop every time. Hand tension alone isn’t consistent enough, even once you’re experienced.
- Change floss shade gradually for a natural shaded look, not in one hard jump between rows.
FAQs
Is contour embroidery stitch hard for beginners?
It takes a little practice to keep rows even, but it’s genuinely beginner-friendly once you’re comfortable with basic stitches like stem stitch and backstitch.
What’s the difference between contour stitch and satin stitch?
Satin stitch fills a shape with straight parallel stitches, while contour stitch follows the curve of the shape itself, giving a more natural, rounded look.
Why is it called the forbidden stitch?
Popular legend says the stitch was banned because its fine, dense knotwork damaged embroiderers’ eyesight over time. It’s a widely repeated story rather than a fully documented historical fact, but the name has stayed regardless.
Can I use French knots inside a contour-stitched design?
Yes. French knots are commonly added as accents — flower centers, berries, or texture dots — alongside contour-filled shapes.
What thread works best for contour stitching?
Stranded cotton floss, using 2–3 strands, is the easiest starting point. It gives good coverage without adding excess bulk to your rows.