

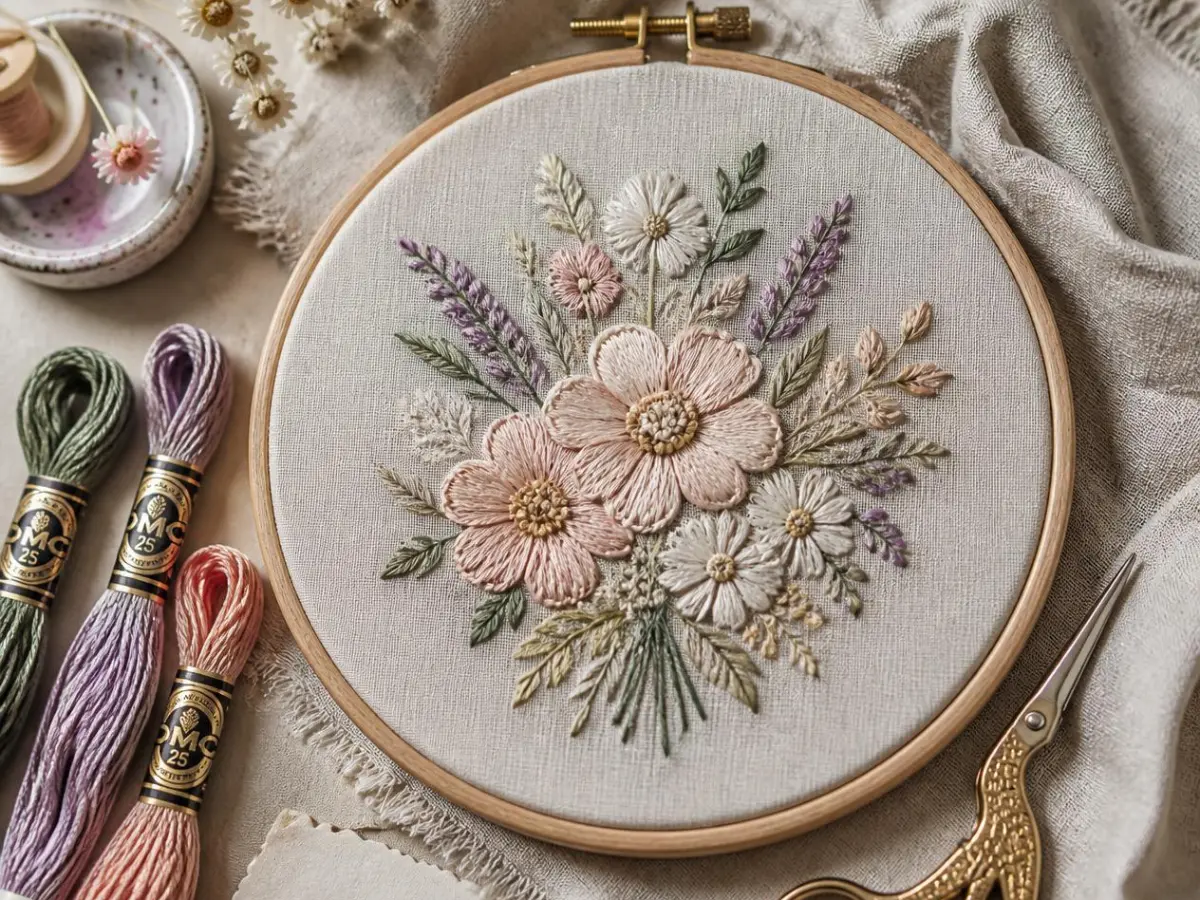
I still remember my first try at embroidery. I used a cream pillowcase, a cheap hoop, and blue thread because it matched my curtains. I didn’t have a plan or a pattern—I just started stitching.
After about 40 minutes, it didn’t look like a flower at all. The thread was messy, the stitches were uneven, and the design looked confusing, almost like a tangled web. It taught me that embroidery needs practice and the right technique to look neat.
But here’s the thing about decorative embroidery — it forgives you. You pick out the bad stitches, you learn what went wrong, and you try again. That pillowcase eventually became one of my favorite pieces, not because it was perfect, but because I finally understood why the stitches sit the way they do. That understanding is what this guide is here to give you, minus the ruined pillowcase.
Table of Contents
What is Decorative Embroidery Designs?
Decorative embroidery is the craft of stitching ornamental patterns onto fabric purely to enhance its look — as opposed to functional stitching, which holds fabric together. It covers everything from a single hand-stitched flower on a napkin to a fully digitized floral spray on a wedding gown.
It generally falls into two working methods:
- Hand embroidery — worked stitch by stitch with a needle, hoop, and floss. Slower, but full of texture and individuality.
- Machine embroidery — worked from a digitized design file (like .DST or .PES) run through a computerized machine. Faster, more consistent, and better suited to repeat projects like team apparel.
Both methods use the same core idea: building an image out of thread, one stitch at a time.
Popular Decorative Embroidery Design Styles
Not every embroidery design fits every project, so it helps to know the main families before you pick a pattern.
1. Floral and Botanical Designs
The most requested decorative embroidery category, hands down. Florals range from tiny single-stem sprigs to oversized, almost painterly blooms. <cite index=”1-1″>Floral embroidery has evolved with oversized blooms, minimalist outlines, and modern gradients</cite> — meaning you’re no longer limited to the tightly packed rose patterns of decades past. A single loose outline of a wildflower can look just as intentional as a dense bouquet.
2. Geometric and Modern Motifs
Clean lines, repeating shapes, and symmetrical patterns. These work beautifully on home décor items like cushion covers and table runners because they read well from a distance.
3. Monograms and Personalization
Initials, names, and dates stitched in decorative script. This remains one of the steadiest trends in the craft because a monogram turns a generic item — a towel, a bag, a baby blanket — into something that feels made for one person.
4. Vintage and Heritage-Inspired Patterns
Think crewel work, folk motifs, and old-world floral borders. <cite index=”2-1″>Retro-inspired embroidery has made a strong comeback, feeling familiar and unique at the same time, which makes it appealing for modern projects</cite>, especially when paired with clean, contemporary layouts instead of busy vintage backgrounds.
5. Textured and Dimensional Work
This includes 3D puff stitching (worked over a foam base to create a raised effect) and layered appliqué, where fabric pieces are stitched down before being outlined in thread. <cite index=”7-1″>3D puff embroidery, built by stitching over foam inserts to create raised relief, has extended beyond caps onto jackets, tote bags, and structured panels</cite>, often mixed with flat stitching for contrast.
Tools and Materials You’ll Actually Need
You don’t need a fully loaded craft room to start. Here’s the honest starter list:
- Embroidery hoop — 6″ or 8″ wood or plastic, to keep fabric taut
- Embroidery needles — a mixed pack, since needle size depends on thread thickness
- Embroidery floss or thread — 6-strand cotton floss is the standard beginner choice
- Fabric — cotton or linen holds stitches best while you’re learning
- Fabric scissors — small, sharp, and dedicated only to fabric
- Water-soluble fabric marker — to trace your design before stitching
- A printed or transferred pattern — free ones are widely available online for beginners
If you’re moving into machine embroidery, add a digitized design file, stabilizer backing, and a machine that supports your file format (DST is the most universal).
How to Start a Decorative Embroidery Design: Step by Step
- Choose a simple design. Start with a single motif — one flower, one leaf, one small monogram — rather than a full wreath.
- Transfer the pattern onto fabric. Use a water-soluble marker or an iron-on transfer to get the outline onto your cloth.
- Hoop your fabric. Stretch it taut like a drum. Loose fabric causes puckered, uneven stitches.
- Thread your needle. Use two to three strands of floss for most decorative work; more strands for bold, textured sections.
- Start with an outline stitch. A backstitch or stem stitch is the easiest way to define shapes before filling them in.
- Fill in with satin stitch or fill patterns. Keep your stitches close and even for a clean, solid look.
- Knot off neatly on the back. No visible knots on the front — that’s the tell of a rushed finish.
- Steam-press from the back once finished, to smooth out any hoop creases.
Tips That Actually Make a Difference
- Match thread weight to fabric weight. Heavy thread on delicate fabric will pucker; thin thread on thick fabric will look weak.
- Keep your stitch length consistent. Uneven stitch length is the single biggest giveaway of a beginner piece.
- Work in good light. Embroidery mistakes hide in shadow until you’ve already stitched three more rows over them.
- Stitch a test corner first, especially with machine designs, before committing to a full piece. This one habit saves more projects than any tool you’ll buy.
- Use lighter, muted color palettes as a base, then bring in one or two bold accent threads. <cite index=”8-1″>Warm, muted palettes are dominating in current color trends, with bright accent colors used sparingly to create contrast and draw the eye</cite>.
Common Mistakes Beginners Make
- Skipping the hoop tension check. Loose fabric is the number-one cause of puckering.
- Choosing a design that’s too detailed too soon. Dense florals with tiny gaps between stitches are genuinely hard for first-timers.
- Using old or dull needles, which snag fibers and fray thread.
- Ignoring fabric prep. Wrinkled or unwashed fabric shifts under the needle and throws off your pattern.
- Ripping out stitches carelessly. Pulling too hard on a mistake can tear delicate fabric — snip threads gently instead.
Where Decorative Embroidery Is Heading
Decorative embroidery has never really gone out of style — it just keeps finding new surfaces. <cite index=”9-1″>Embroidery has become a language of personality and style, showing up in uniforms, branded merchandise, personalized hoodies, and premium apparel, not just decorative pieces</cite>. Whether you’re stitching by hand for the calm of it or setting up a machine file for a small business, the appeal is the same: a design that couldn’t be replicated by print, because it was actually built one stitch at a time.
Frequently Asked Questions
What is the easiest decorative embroidery design for beginners?
Simple line-based designs like a single leaf, a small flower outline, or basic lettering are easiest. Stick to backstitch and satin stitch before moving to dense fill patterns.
What fabric is best for decorative embroidery?
Medium-weight cotton or linen is ideal for beginners. It holds its shape in the hoop and doesn’t stretch or fray easily while you’re learning stitch tension.
How many strands of embroidery floss should I use?
Two to three strands work well for most decorative designs. Use all six strands for bold, chunky outlines, and one strand for fine detail work.
Can decorative embroidery be done by machine?
Yes. Machine embroidery uses digitized design files run through a computerized embroidery machine, producing consistent results quickly — ideal for repeat items like uniforms or gifts.
How do I stop my embroidery from puckering?
Keep your fabric drum-tight in the hoop, avoid pulling thread too tightly with each stitch, and use a stabilizer backing for lightweight fabrics.