

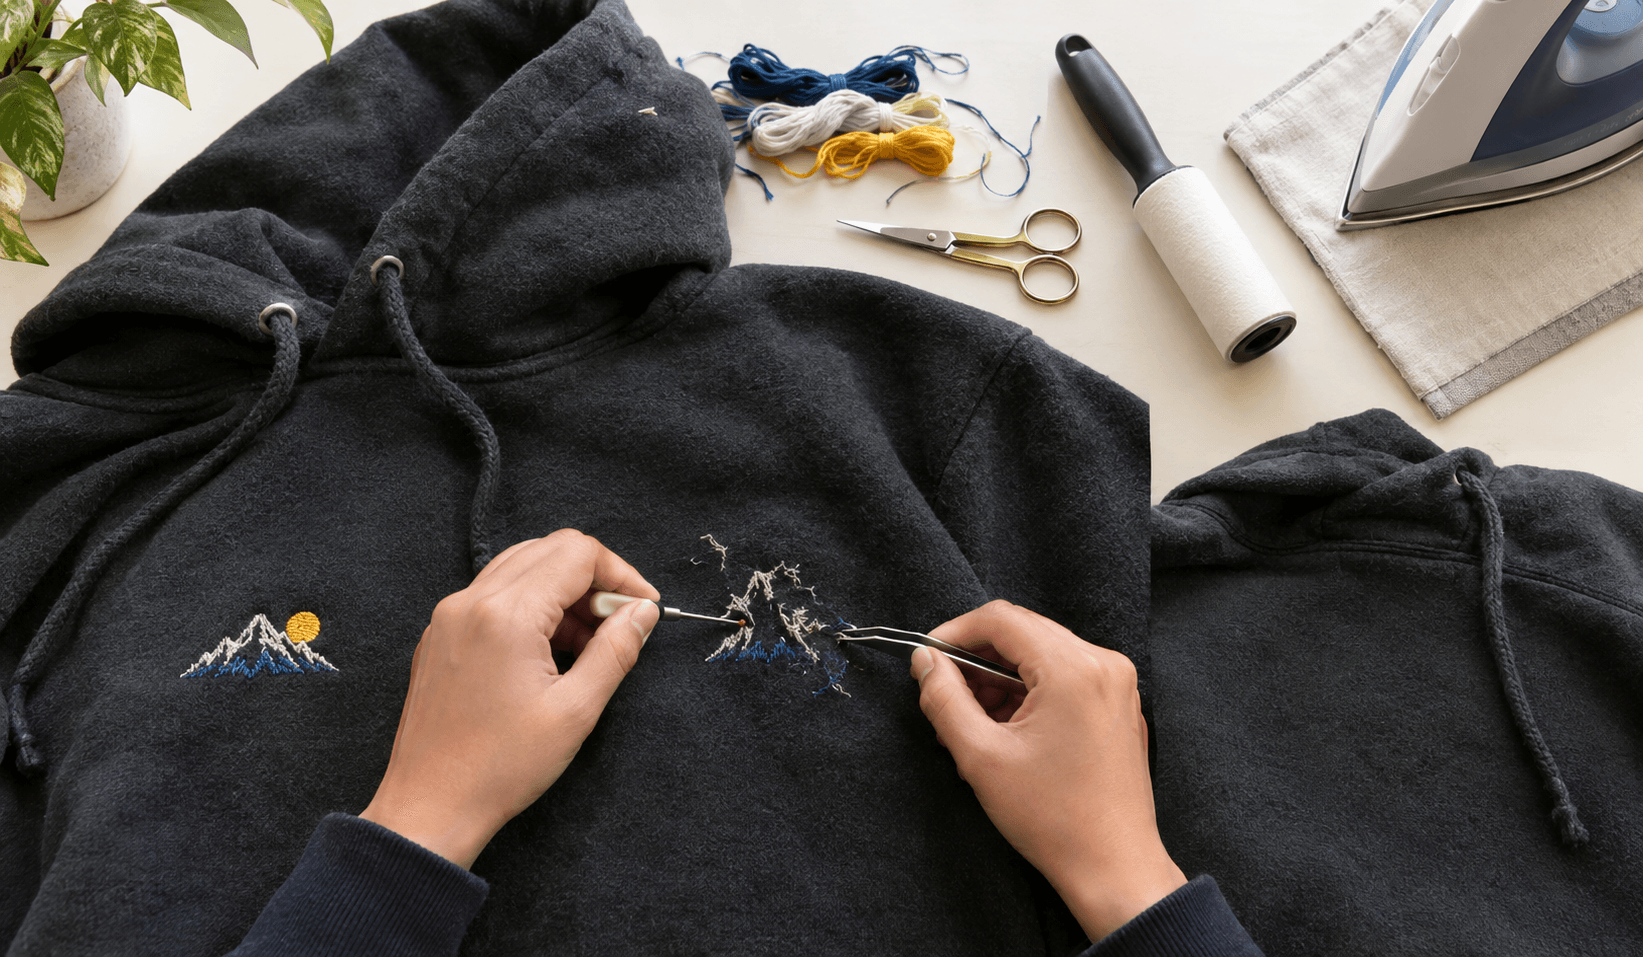
You can take off embroidery from a hoodie with a sharp seam ripper, fine tweezers and a little steam. Cut the threads from the inside, pull the top stitches out from the front, then steam the spot so the fabric relaxes. A small logo takes about 30 minutes.
I’ve unpicked a lot of embroidery over the years, and hoodies taught me the most. The fleece is forgiving until the moment it isn’t, so here is the method I trust now.
What Is Actually Holding the Design
Machine embroidery on a hoodie has three layers: the top thread you see, a bobbin thread on the inside, and usually a stabilizer (backing) behind the stitches. My first mistake was yanking the top thread. It fought me every single time, because the bobbin thread was still locking it in place. Once I started cutting from the inside, everything got easier.
Tools You’ll Need
- Sharp seam ripper with a small ball tip
- Fine-tip tweezers
- Small embroidery scissors
- Lint roller
- Steam iron and a thin pressing cloth
Replace a dull ripper before you start. A blunt blade snags the fleece, and that’s where most accidental holes come from.
Step-by-Step Method
- Turn the hoodie inside out. Find the bobbin stitches and the backing. I take a quick photo of the design first, just in case.
- Hold the fabric gently taut. Slack fabric bunches up, and that’s when the blade slips.
- Cut from the inside. Slide the ripper under a few stitches at a time and lift. Never press down into the fleece. I work about a thumb’s width at once.
- Trim loose backing. Use small scissors, and cut only the stabilizer, never the hoodie.
- Flip it right side out and pick. Lift the loosened top threads with tweezers. If one resists, stop pulling. There’s an uncut stitch somewhere inside.
- Lint-roll both sides. Tiny threads hide in fleece and make the spot look messy.
- Steam. Lay the cloth over the area, hold the steam close, then brush the pile gently with your fingers. This closes most needle holes.
- Wash it according to the care label.
How Long It Really Takes
In my experience, a small chest logo takes 20 to 40 minutes. A name or text takes up to 90 minutes. A big, dense back design can take two hours or more.
Mistakes I’ve Made (So You Don’t Have To)
- Pulling the top thread first. It stretches the fabric.
- Cutting too many stitches at once. You lose control fast.
- Pressing hard with a hot iron. On a polyester blend this can leave a shiny mark. Test heat on a hidden spot, like the inside hem.
- Rushing the last few stitches. That’s where I’ve slipped before.
If You Still See a Ghost Outline
Dense or old stitching sometimes leaves a faint mark. A second round of steam and a wash fixes most of them. When it doesn’t, I cover the spot with a small appliqué patch. Honestly, a few of my favorite hoodies exist because an embroidery removal went slightly wrong.
If the hoodie is vintage or expensive, or the design is packed with stitches, a tailor or embroidery shop is a smart call.
Frequently Asked Questions
Will removing embroidery leave holes?
Tiny ones, sometimes. Steam, light brushing and a wash hide most of them.
Should I cut from the front or the back?
The back. It’s safer for the fabric and loosens the top stitches so they come out easily.
What if it’s an iron-on patch, not stitching?
That’s a different job. Warm it through a pressing cloth to soften the glue, then peel slowly. If it’s also sewn on, cut those stitches first.
Final Thoughts
Taking off embroidery from a hoodie rewards patience more than skill. Cut from the inside, lift from the front, steam to finish, and keep your tools sharp.
About the Author: Sara McLean is the creator of AppliquéFits.com and a textile designer who shares practical appliqué, sewing, and fabric-design ideas.