

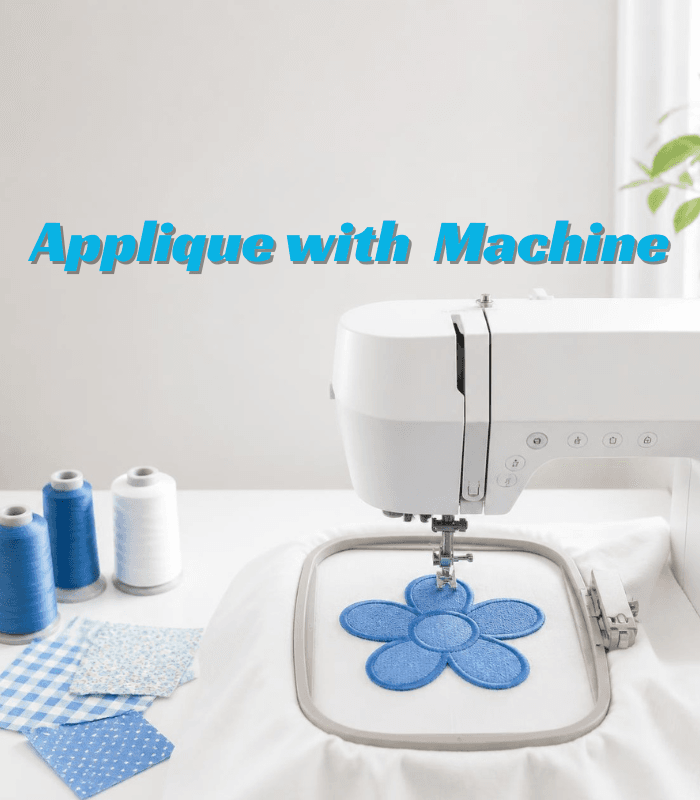
For years, I was that person who insisted machine applique looked “cheap” and “impersonal.” I hand-stitched everything and felt a little smug about it. Then one day, exhausted after spending 40 hours on a quilt that should’ve taken 8, I decided to give machine applique a real try. I was skeptical. I was also desperate.
What happened next changed everything. My embroidery machine delivered crisp, professional results in a fraction of the time. And honestly? The work looks beautiful. Not “homemade beautiful”—it looks like something a professional textile artist created.
If you’re like me and have been hesitant about machine applique, I’m here to tell you: it’s worth learning. In this tutorial, I’ll share the exact process I use now, based on hundreds of machine-stitched projects and real testing (including plenty of failures). You’re going to create something amazing.
Table of Contents
What You’ll Need (The Honest Version)
You Probably Already Have These:
- Embroidery machine (seriously, any model works—I’ve done beautiful applique on machines from 2010)
- Scissors (use sharp ones, not the ones you’ve been using since 2005)
- Fabric pencil or marker
You Need to Buy These (and they’re worth it):
- Stabilizer—get both tear-away AND water-soluble. I used to skimp here and paid for it with puckered backgrounds. Not fun. Trust me.
- Quality spray adhesive—this is the single biggest game-changer. Cheap spray adhesive leaves sticky residue that makes you want to quit. Professional spray adhesive holds perfectly and cleans up. Yes, it costs more. Yes, it’s worth every penny.
- Thread that matches your appliqué fabric (not your background—I learned this the hard way)
Really Nice (But Optional):
- Embroidery hoop if your machine uses one
- Design software to resize patterns (but honestly, you can trace and cut by hand too)
- A fabric marker that actually washes out (I’ve had to throw away so many marked-up fabrics because I used permanent markers)
Let’s Actually Do This
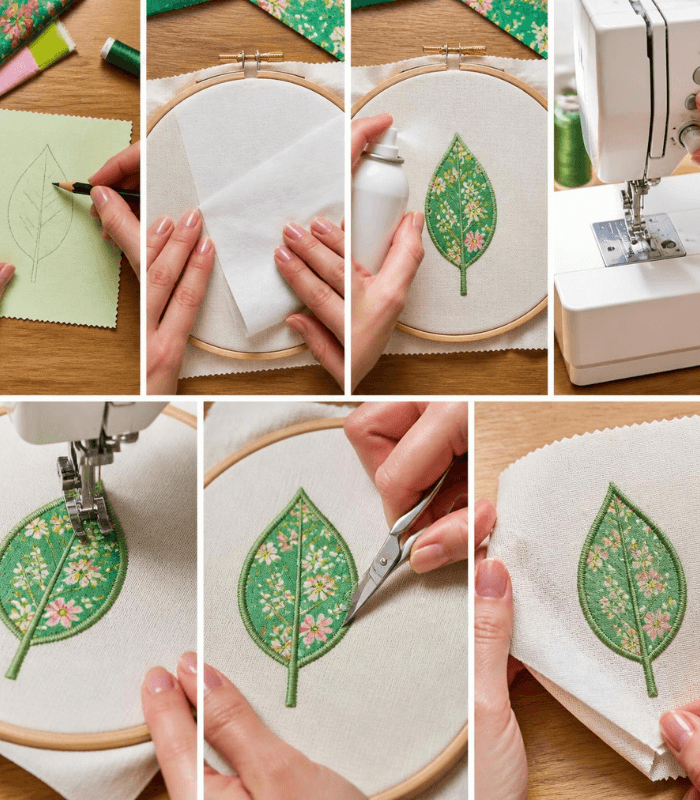
Step 1: Pick Your Design (and Start Simple)
Choose a design. Here’s my honest advice: start with something basic. Circles. Stars. A simple leaf. I know you’re tempted to dive into that intricate 20-piece design—don’t. I did, and I spent three hours troubleshooting a design that would’ve taken 30 minutes with something simpler.
Trace it onto your appliqué fabric with a pencil. Add a 1/4-inch seam allowance beyond your line. Cut it out carefully. Yes, precision matters here. No, you don’t need to be perfect.
Step 2: Stabilize (This Is Super Important—Seriously)
Okay, this step literally determines if your project looks amazing or disasters. I once skipped stabilizer thinking I was being efficient. My background fabric puckered so badly I wanted to cry. Don’t be me.
Place stabilizer (tear-away works) on the WRONG side of your background fabric. For bigger projects (anything over 12 inches), use water-soluble stabilizer instead. It just dissolves away—no residue, no stress. Your background will thank you.
Step 3: Glue That Appliqué Down
This is where spray adhesive becomes your best friend. Spray lightly on the back of your appliqué piece. Position it carefully on your background. Press it down. Now it’s not going anywhere—no slipping, no shifting, no prayers while stitching.
Step 4: Talk to Your Machine
Set your machine to satin stitch (width 2.5-3.0mm). Start with medium stitch length (2.0mm). Thread it with color that matches your appliqué, not your background. Then—and this is important—test on a practice scrap. Two minutes of testing saves hours of frustration. I’ve learned this lesson multiple times.
Step 5: Actually Stitch (The Moment of Truth)
Here’s the magic: position your needle so it stitches along the edge where appliqué meets background. About half the stitch goes on appliqué, half on background. This creates that clean, professional edge.
Stitch slowly. Your machine will handle curves beautifully if you let it. When you hit sharp points? Stop, needle down, lift presser foot, pivot, continue. It’s like doing a graceful three-point turn.
Step 6: Trim the Mess
Use sharp embroidery scissors and carefully trim away extra seam allowance close to your stitching. This takes patience but makes the difference between “looks homemade” and “looks professional.”
Step 7: Clean Up
Tear away stabilizer gently. If you used water-soluble? Rinse under lukewarm water and let it dry. That’s it. You’re done.
Real Talk: Lessons I Learned (So You Don’t Have To)
Your tension is probably wrong. I spent weeks assuming my machine was broken before realizing I just had tension set too tight. Loosen your top tension slightly. It feels counterintuitive, but it works. Test on practice fabric first—seriously, those two minutes of testing save hours of frustration.
Cheap spray adhesive will haunt you. The dollar-store version leaves sticky residue that never comes off. It ruins your presser foot. It ruins your mood. Invest in professional-grade spray adhesive. Your future self will be grateful.
Preshrink everything before you start. This was my biggest mistake. Machine appliqué looks absolutely perfect… until you wash your quilt and the background shrinks differently than the appliqué. Now you have wavy, bumpy edges. So preshrink your fabrics. It takes an extra hour upfront and saves heartbreak later.
Start with curves, not chaos. My first “complex” design had 20 different pieces. I nearly quit sewing forever. Now I always recommend starting with simple appliqué—maybe a heart or a star. Your curves will be smooth. Your confidence will grow. Then tackle the complicated stuff.
Questions I Get Asked
Can I use an embroidery machine to create appliqué designs?
Yes. Most embroidery machines can create appliqué using placement, tack-down, and finishing stitches.
What’s the best way for beginners to start machine appliqué?
Begin with simple shapes, quality stabilizer, and quilting cotton to build confidence.
How can embroidery designs be converted into appliqué?
Replace stitched areas with fabric pieces and secure them using appliqué stitch files.
Which stitch works best for machine appliqué?
A satin stitch is the most common choice because it creates smooth, durable edges.
What are the steps for making appliqué with an embroidery machine?
Hoop the fabric, stitch the placement line, add fabric, trim, and finish with the border stitch.
Can you make appliqué with an embroidery machine without using a hoop?
Most embroidery machines require a hoop for accurate stitching, though specialty methods are available.
What’s the correct way to appliqué directly onto fabric?
Use stabilizer, secure the appliqué fabric, and stitch the design with your embroidery machine.
How can beginners learn embroidery machine appliqué?
Practice with simple designs and follow built-in appliqué patterns before trying detailed projects.
How do you create appliqué on a Brother embroidery machine?
Load an appliqué design, follow the machine prompts, trim the fabric, and complete the finishing stitches.
How is appliqué embroidery done by hand?
Fabric shapes are stitched onto a background using small, nearly invisible hand stitches.
Is embroidery machine appliqué suitable for beginners?
Yes. It is beginner-friendly because the machine handles most of the stitching process.
Where can you find machine embroidery appliqué designs?
You can find them on embroidery design websites, quilting marketplaces, and machine manufacturer libraries.
Here’s What I Want You to Know
I spent years thinking machine appliqué was a shortcut—something “less than” real sewing. I was wrong. Completely wrong.
Machine appliqué is different from hand-stitching, not inferior. It’s faster, yes. But more importantly? It lets you create more, experiment more, finish projects that you’d abandon halfway through if you had to hand-stitch them. It opens creative doors that hand-sewing keeps closed.
By Sara McLean , Textile Designer & Founder of AppliquéFits.com